Home screen
The home screen is your primary workspace. It displays a personalized greeting, skill cards tailored to the active persona, and a persistent chat input bar.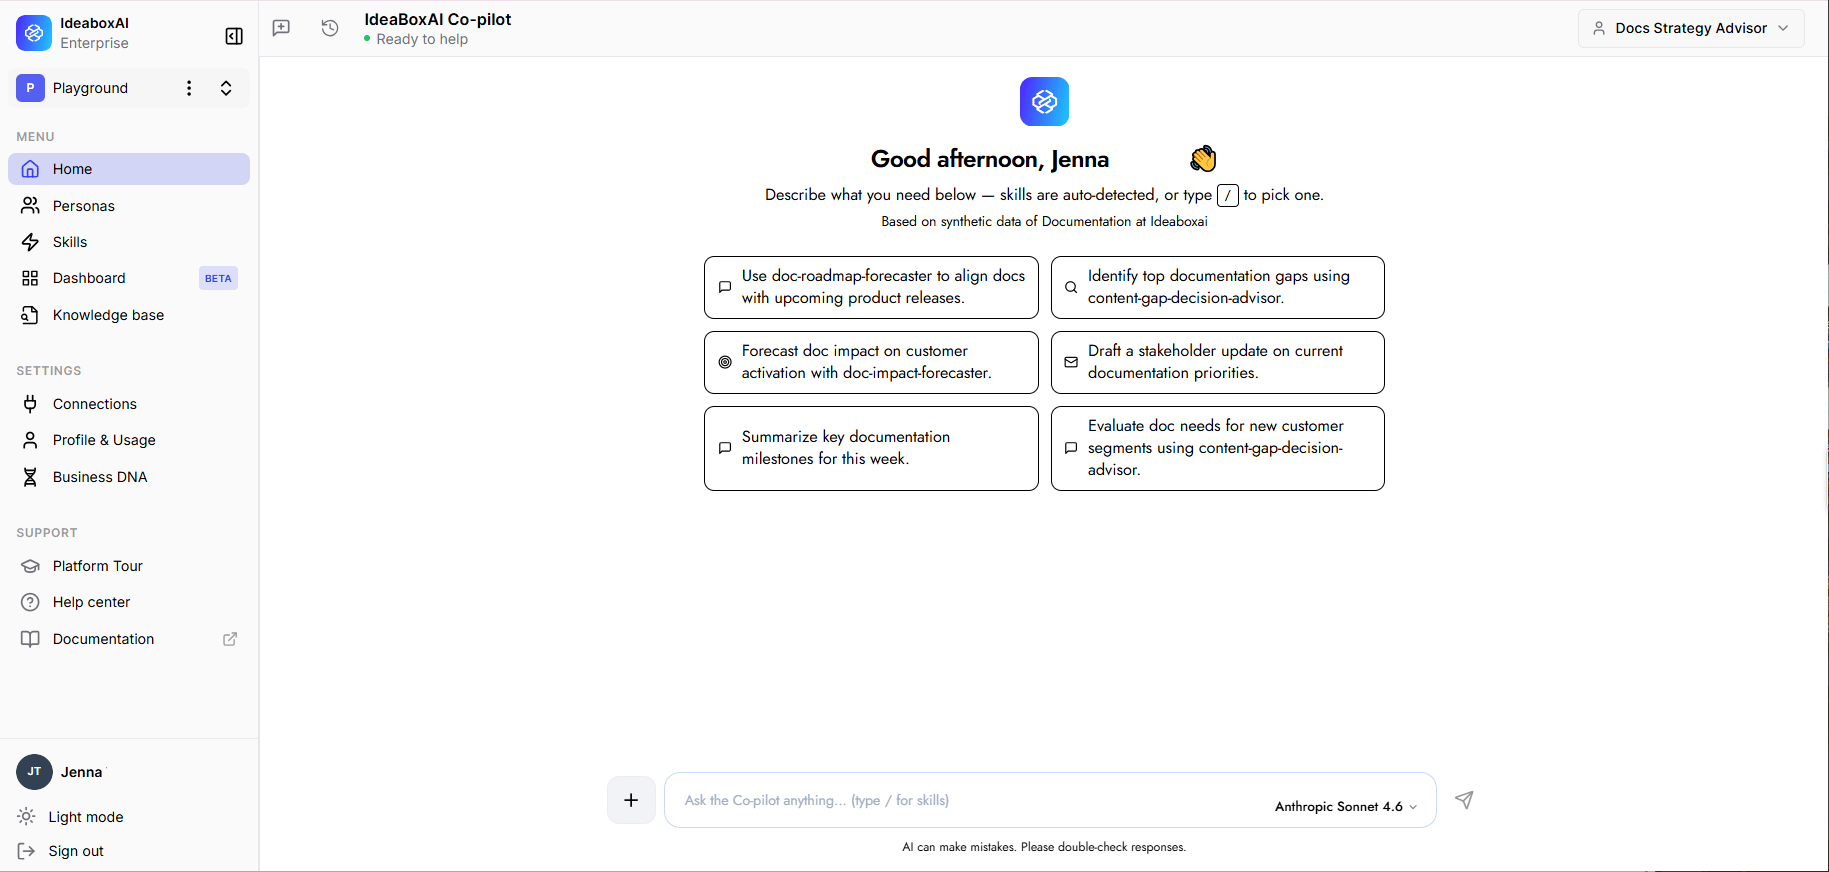
Greeting
The home screen displays a personalized welcome message along with a description of the Persona AI’s capabilities.
Good morning, [name]!
Describe what you need below; skills are auto-detected, or type / to pick one.
Quick starter prompts
Six quick-start prompts are displayed in a 2-column grid, tailored to the active persona.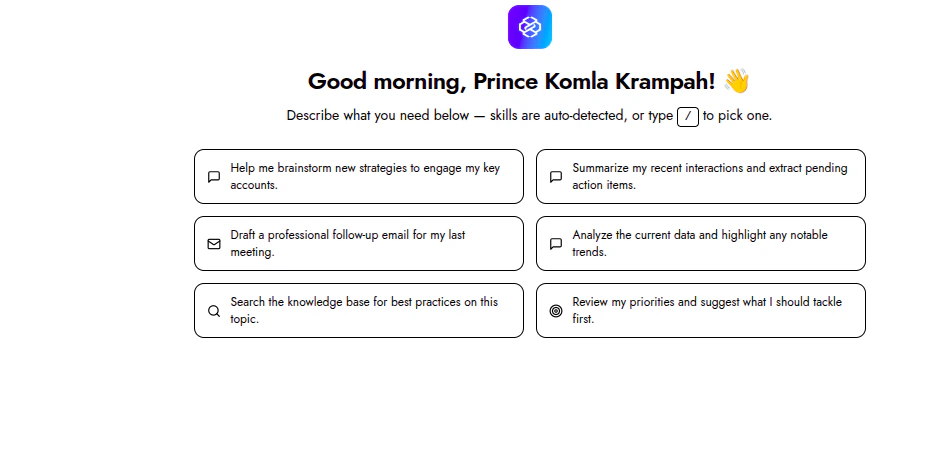
- Icon and prompt: Each card contains an icon paired with a natural language prompt that represents a common task for the current persona.
- One-click pre-fill: Clicking a card pre-fills the chat input with that prompt, so you can review it before sending.
- Persona-tailored: Cards change when you switch personas, reflecting the tasks and prompts relevant to each role.
Chat input bar
The chat input bar is persistent at the bottom of the home screen.- Placeholder text: Ask the Persona AI anything… (type / for skills)
- Attach button: The + icon on the left allows you to attach files or context to your message.
- Submit button: The arrow icon on the right sends your message.
- Status indicator: Displays Ready to help (green dot) in the top bar, or a processing state while the system is working.
The chat input remains visible on every screen so you can send a message at any time without navigating back to the home screen.
Model selector
Next to the chat input, a model dropdown lets you choose which LLM handles your request. By default, this is set to Auto.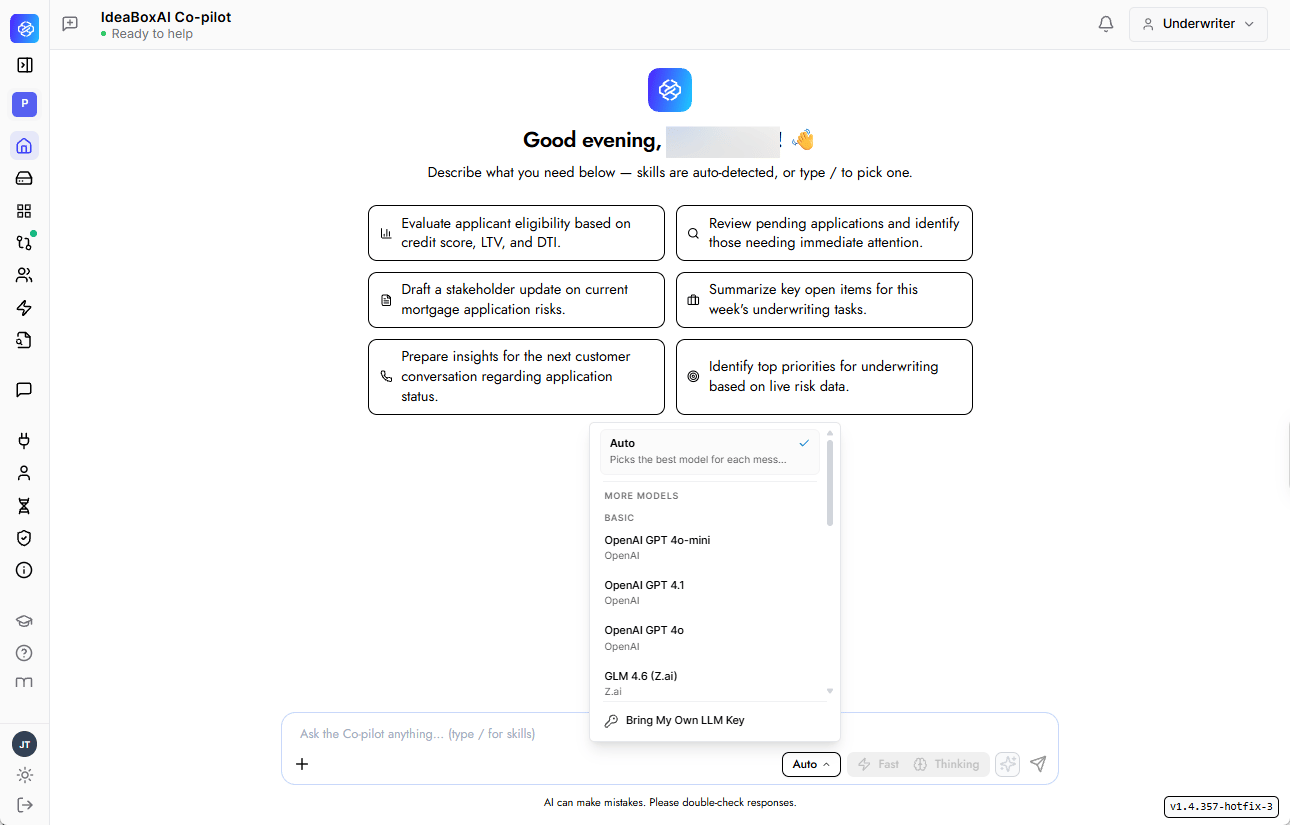
Auto mode
When Auto is selected, the platform analyzes each request before choosing a model, rather than sending every request to the same one.- What it evaluates: Task type, complexity, context size, whether the request includes multimodal input (like images), and cost.
- What it decides: The most appropriate model and reasoning level, chosen from your tenant’s permitted model list.
- Where requests go: Simple requests route to faster, lower-cost models. Complex reasoning and long-context tasks route to higher-capability models automatically.
Every routing decision is logged, including the model selected, the reasoning level used, the reason for that choice, and the outcome. Routing behavior is controlled by policy and can be updated without a platform deployment.
Query-aware classification
Auto mode classifies each incoming query before it runs, so the routing decision is based on what your specific request actually needs rather than a fixed, static rule.- Each query is evaluated individually to determine the best-fit model.
- This improves response quality on complex tasks while keeping costs down on simpler ones.
Bring your own key
If your admin has connected your organization’s own LLM provider credentials, a Bring My Own LLM Key option also appears at the bottom of the model dropdown, alongside the platform-provided models.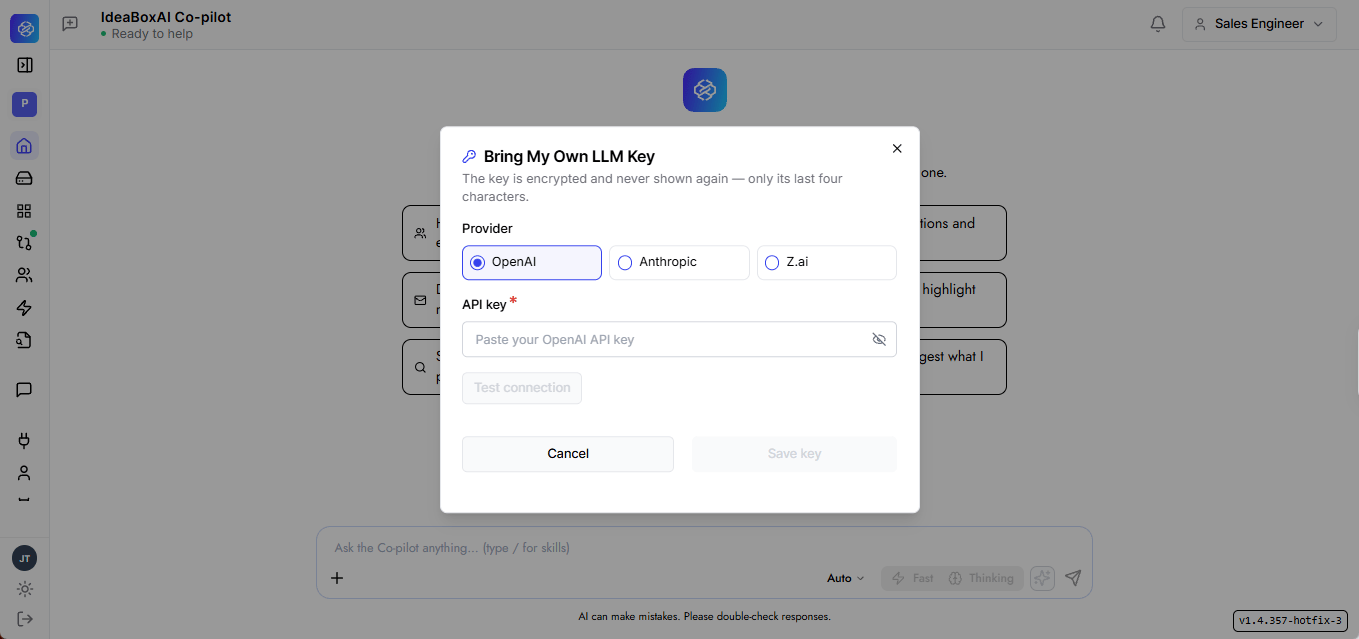
Question box
When the Persona AI needs more context before it can act confidently, it pauses and shows a focused question box directly in the chat instead of guessing or giving a vague response.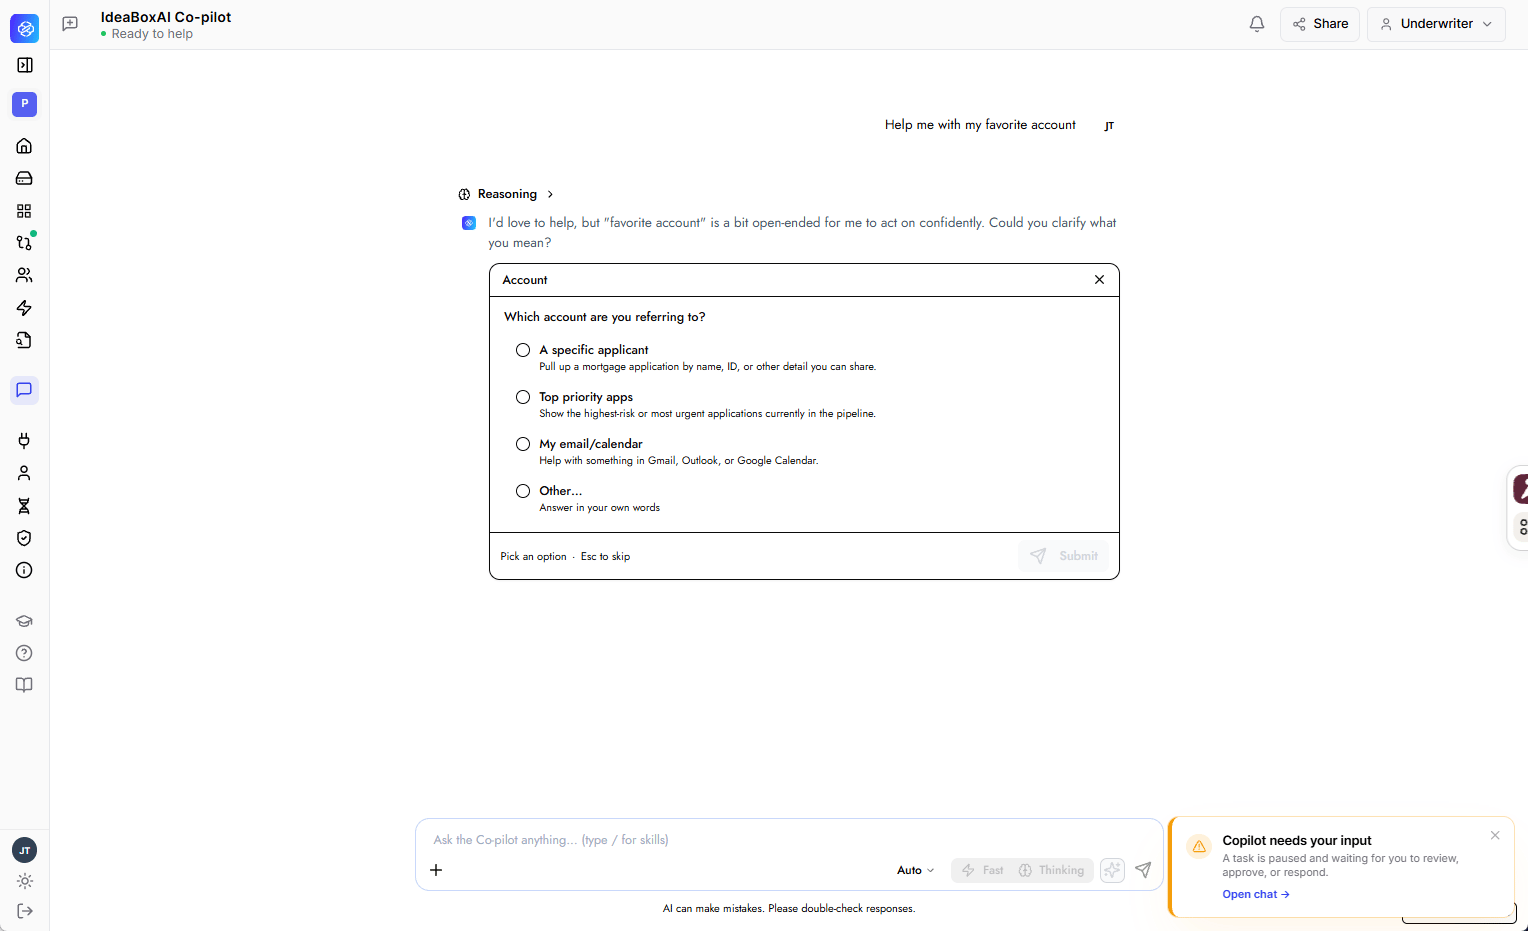
- A specific applicant — Pull up a mortgage application by name, ID, or other detail you can share.
- Top priority apps — Show the highest-risk or most urgent applications currently in the pipeline.
- My email/calendar — Help with something in Gmail, Outlook, or Google Calendar.
- Other… — Answer in your own words.
- 1–3 targeted questions: The Persona AI asks only what it needs — never more than three questions at a time.
- Clear options with a free-text fallback: Each question offers a small set of options plus an Other… choice so you can respond in your own words if none of the options fit.
- Submit to continue: Select an option (or type a response) and click Submit. The Persona AI then proceeds with your original task using your answers.
- Collapses after submission: Once submitted, the question box closes and collapses to a read-only summary in the conversation thread, so the context stays visible without cluttering the chat.
- Skipping is always available: Press Esc or use the skip option to bypass the question box at any time. The Persona AI states the assumptions it’s making and continues with the task.
The question box is fully keyboard-accessible and works at any chat width.
Prompt enhancement
The Enhance Prompt button sits next to the Persona AI chat input. Use it to sharpen a draft prompt before sending it, without having to rewrite it yourself.- One-click rewrite: Click Enhance Prompt to rewrite your current draft for clarity, specificity, and structure — adding missing context, defining the desired output format, and removing ambiguity.
- Review before sending: The enhanced version replaces the draft in the chat input field, so you can review or further edit it before executing.
- Nothing is silently discarded: Your original prompt is preserved. If you prefer it, you can revert back to what you originally wrote.
- Fails safe: If enhancement doesn’t succeed for any reason, your original prompt is sent as-is, without interrupting your workflow.
The level of enhancement depends on how much detail is already in your original prompt — a short, vague prompt sees more rewriting than one that’s already well-specified.
Response mode: Fast vs. Thinking
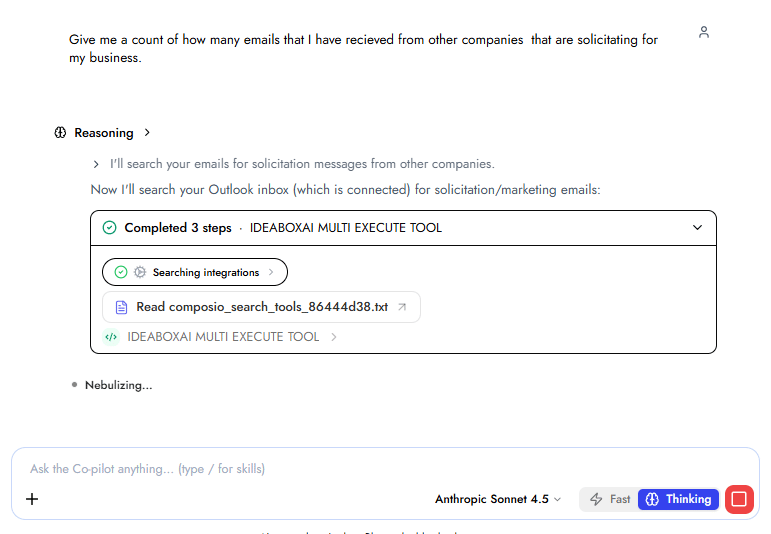
Two response modes are selectable from the chat input bar.- Fast (default): optimized for quick, direct answers to everyday tasks and questions.
- Thinking: works through a reasoning step before responding. Best suited for complex analysis, multi-step tasks, and nuanced questions where accuracy matters more than speed.
Persona switching
Each persona surfaces different skill cards and knowledge base scope. Switching personas updates all of these immediately.1
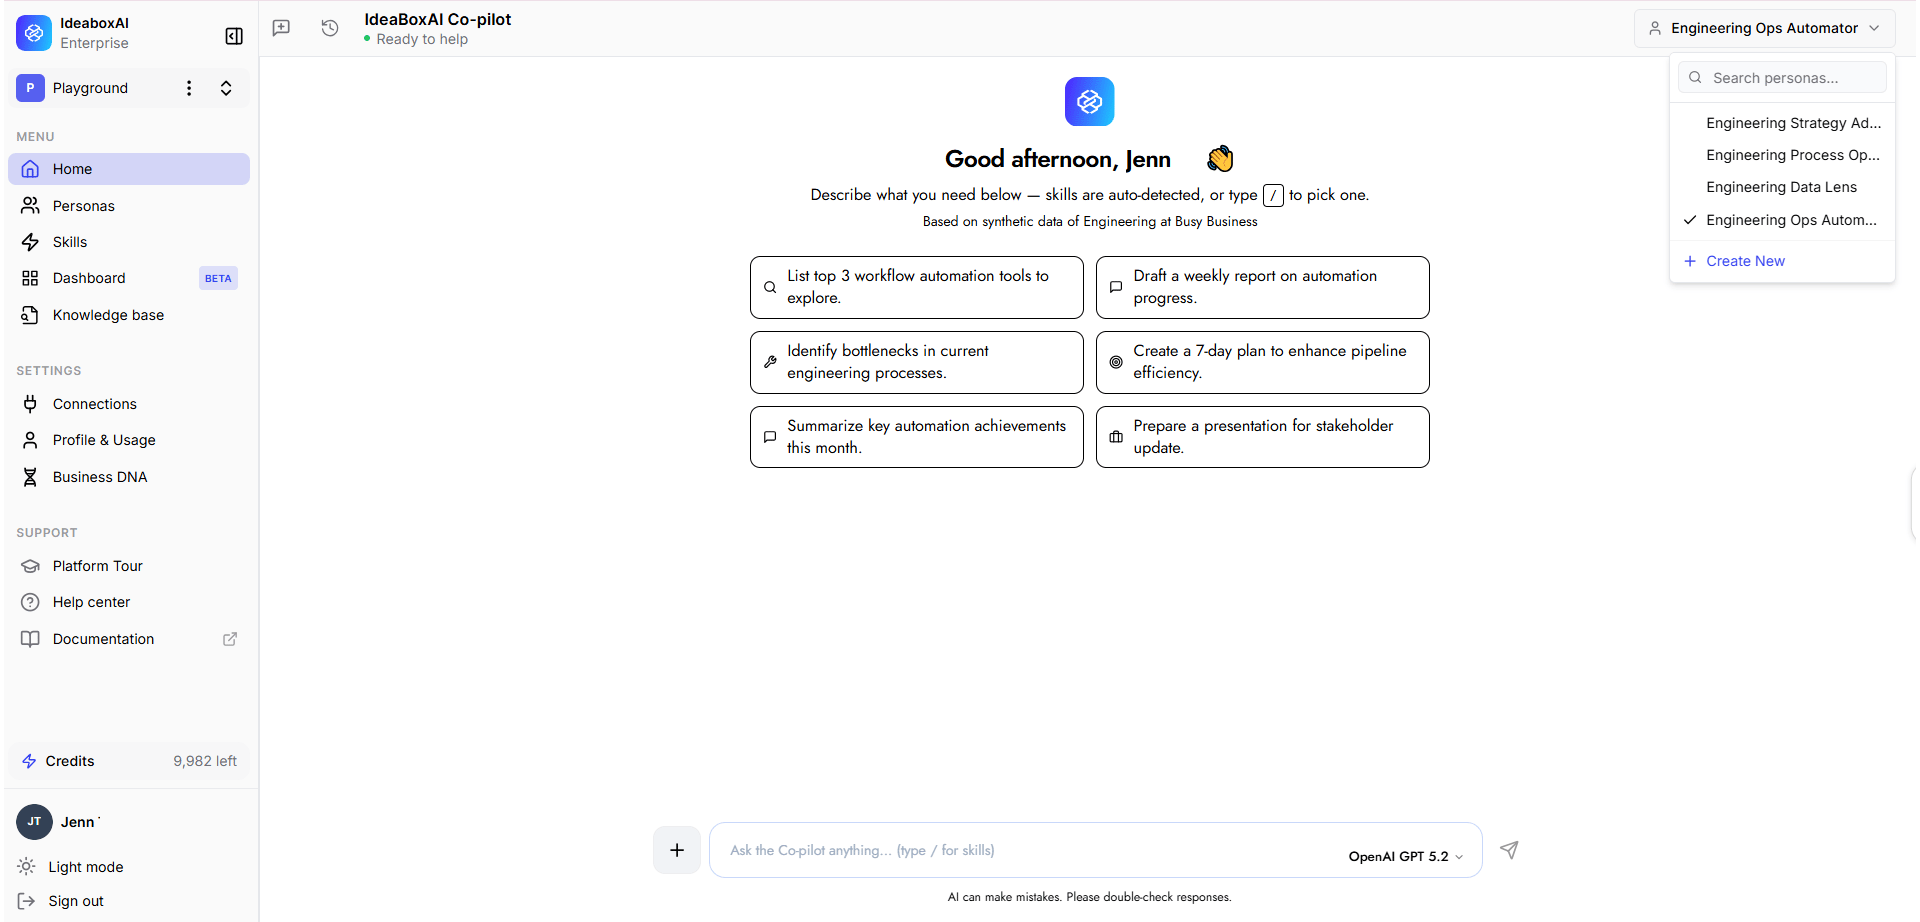
Open the persona dropdown
Click the persona selector in the top-right corner of the header.
2
Select a persona
Choose the desired persona from the list. A checkmark indicates the currently active persona. You can also click + Create New to create a persona directly from this dropdown.
3
Verify the update
The home screen refreshes: skill cards and knowledge base scope all reflect the newly selected persona.
Switching personas does not affect your conversation history. You can change personas mid-session and still access previous conversations.
Chat History panel
Click the history icon (clock) in the top-left header to expand the Chat History panel as a left sidebar.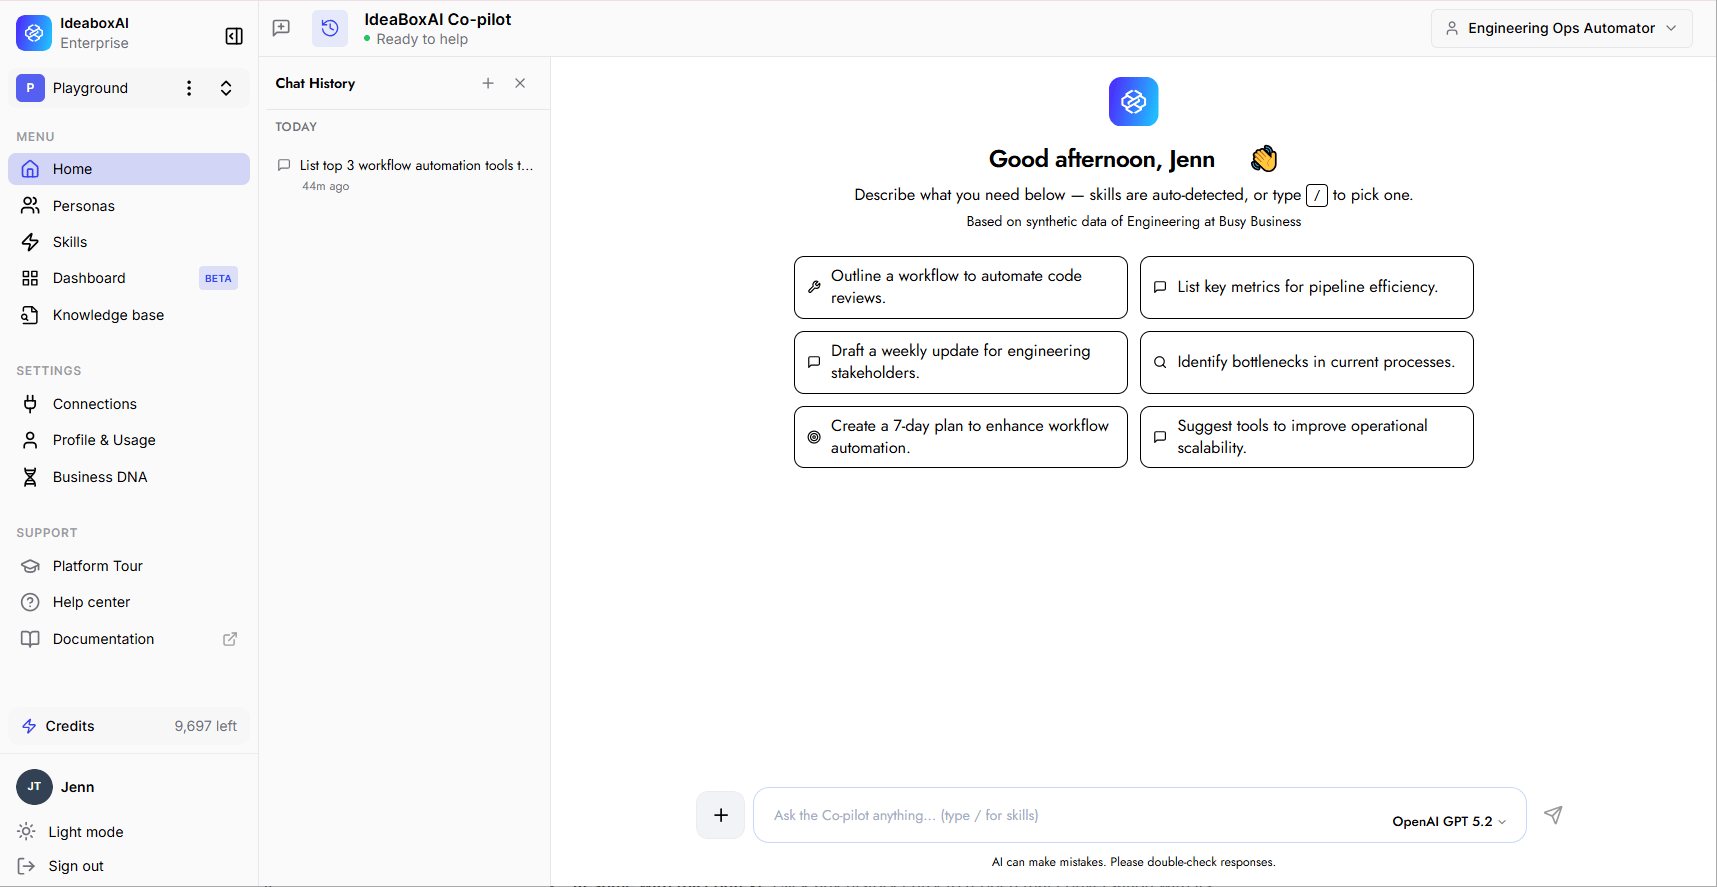
- Grouped by recency: Conversations are organized under headings such as Last 7 Days.
- Truncated summaries: Each entry shows a short summary of the conversation topic with a relative timestamp.
- New conversation: Click the + button at the top of the panel to start a fresh conversation.
- Close the panel: Click the x button to collapse it.
- Resume with full context: Click any history entry to reopen that conversation with its complete context intact.
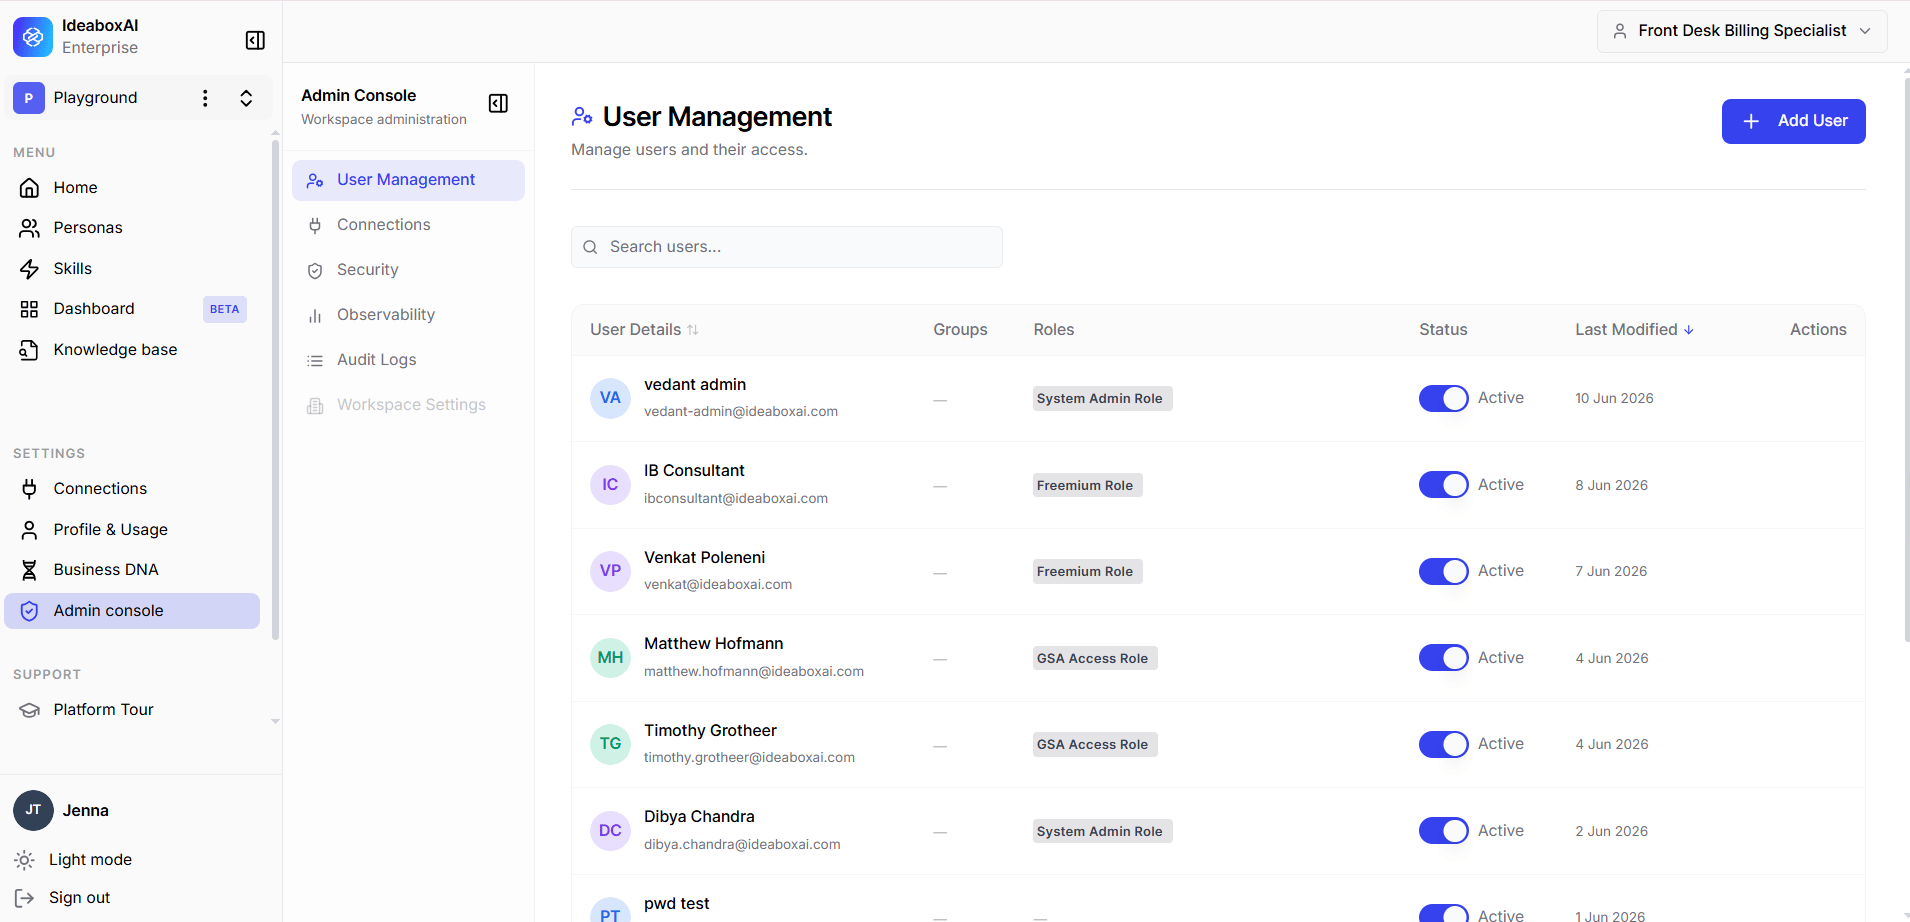
Accessing the Admin Console
Access User Management, Connections, Security, Observability, and Audit Logs from the Admin Console. Only users with admin privileges can access this area.1
Under Settings, select the Admin Console
The Admin Console’s left navigation opens; there, you can access User Management, Connections, Security, Observability, and Audit Logs.