How personas work
Each persona configures three key areas.- Starter prompts: Natural-language prompt cards shown on the home screen, based on the persona description and how the user interacts with the copilot. These help users get started quickly with common tasks for their role.
- Skills: Purpose-built capabilities assigned to the persona that define what it can do. Skills handle specific tasks such as generating reports, drafting documents, or analysing data.
- Knowledge base scope: Which connected data sources and documents the persona can access and query.
When a user switches personas, all three areas update immediately, no page refresh required.
Supported personas
The platform ships with built-in personas, and administrators can create custom personas for any role in the organisation. Each persona is designed around a specific role, its goals, and the workflows it performs daily. A well-configured persona includes:- Role definition: A clear description of who the persona is for and what they do.
- Goals: The outcomes the persona is optimised to support.
- Pain points addressed: The manual or inefficient processes the persona eliminates.
Navigate to persona management
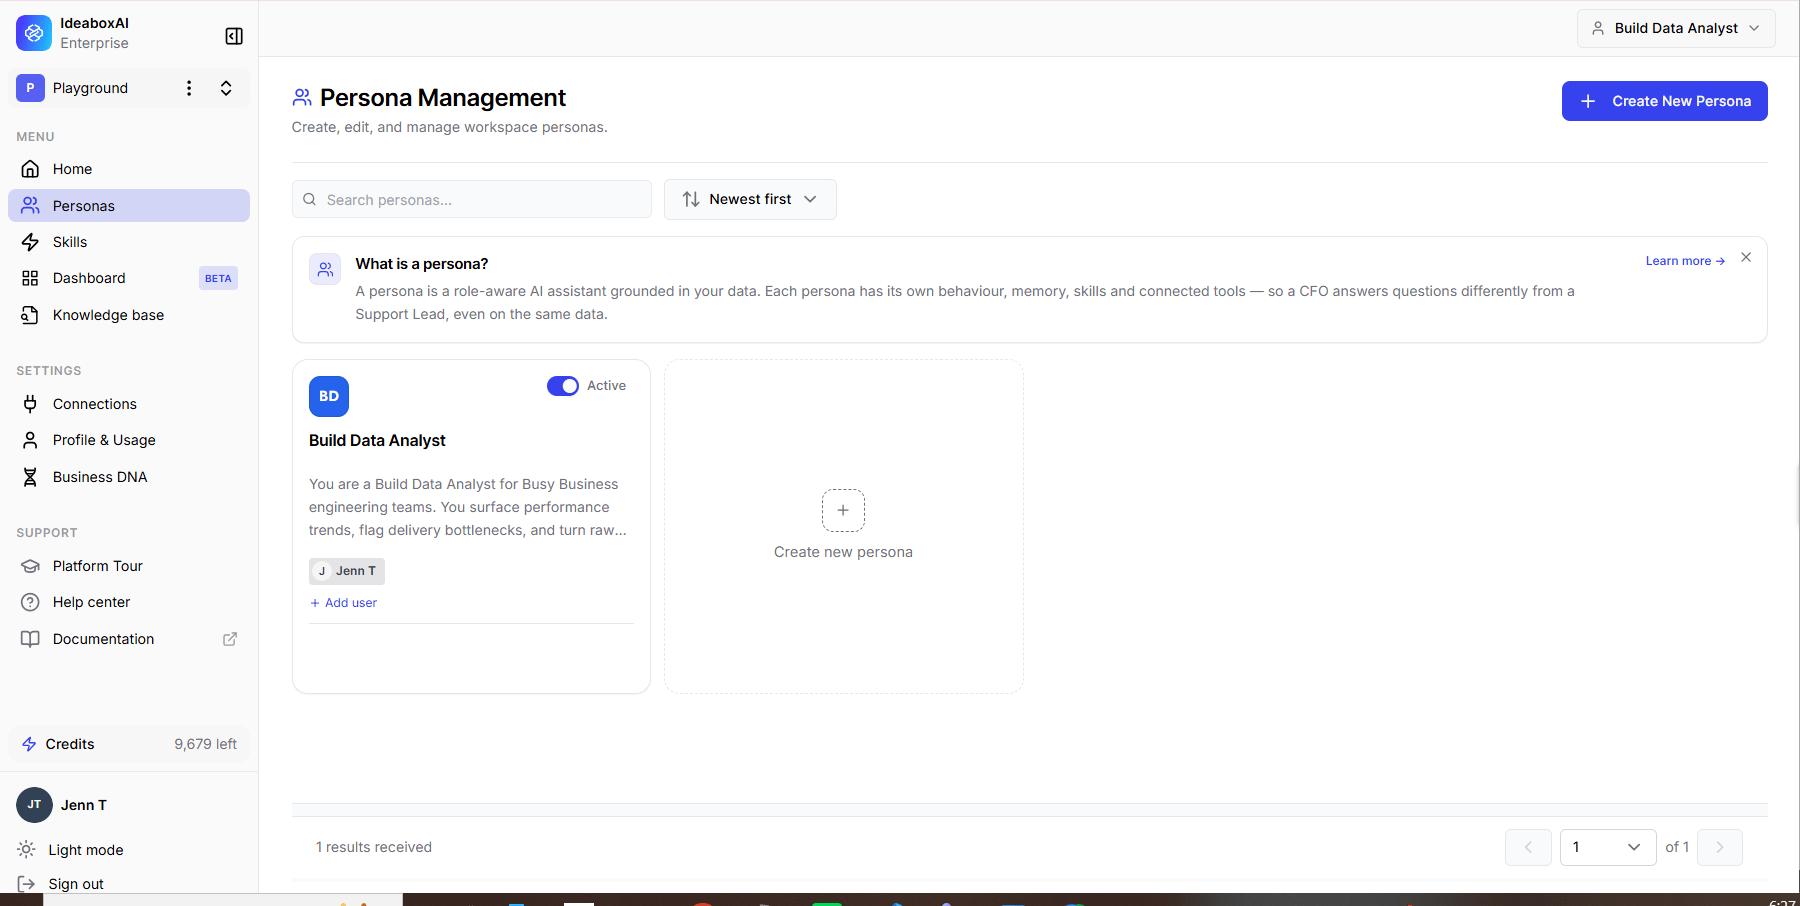
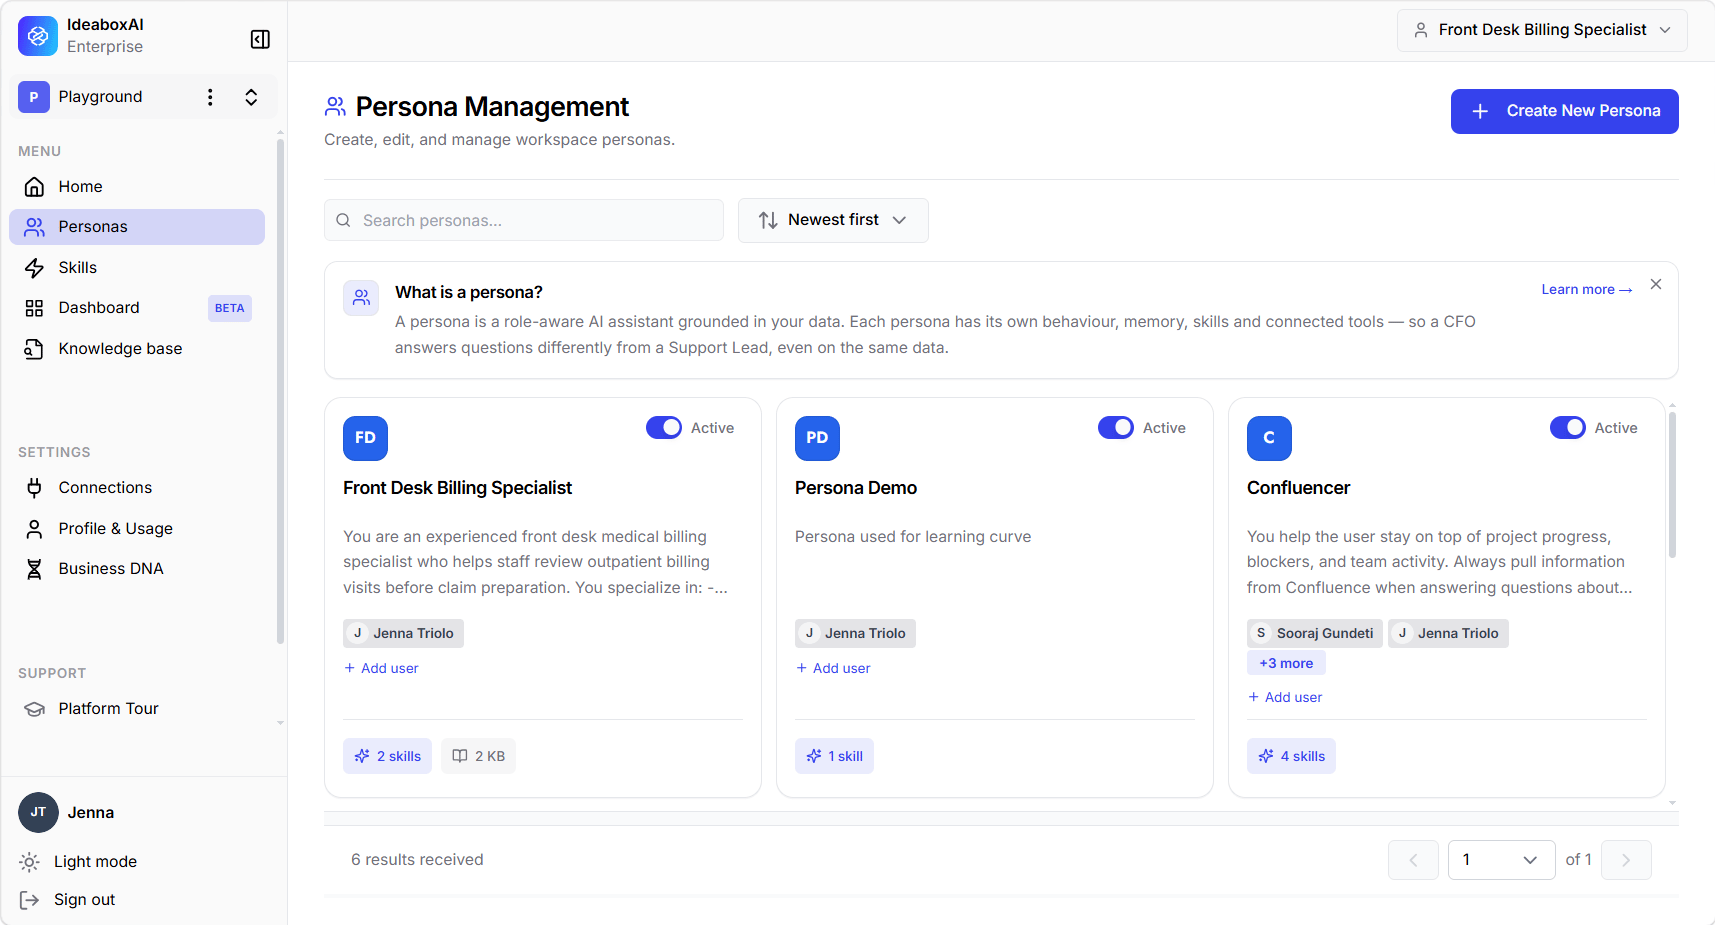
Open Persona Management from the left navigation. The Persona Management page lists every existing persona as a card. Use the Search personas box to filter by name and the Newest first dropdown to change the sort order. Each persona card shows the following.| Element | Description |
|---|---|
| Avatar and name | The persona’s coloured avatar initials and its name. |
| Active toggle | Enable or disable the persona directly from the card. |
| Description | A short summary of the persona’s role and behaviour. |
| Assigned users | Avatar chips for assigned users, with a + Add user action to assign more. |
| Skills and knowledge | Badges showing the number of skills and knowledge base items attached. |
Create or edit a persona
Click Create New Persona in the top-right corner, or click the Edit action on an existing persona. When no personas exist yet, the page shows a No personas yet empty state with a Create new persona button.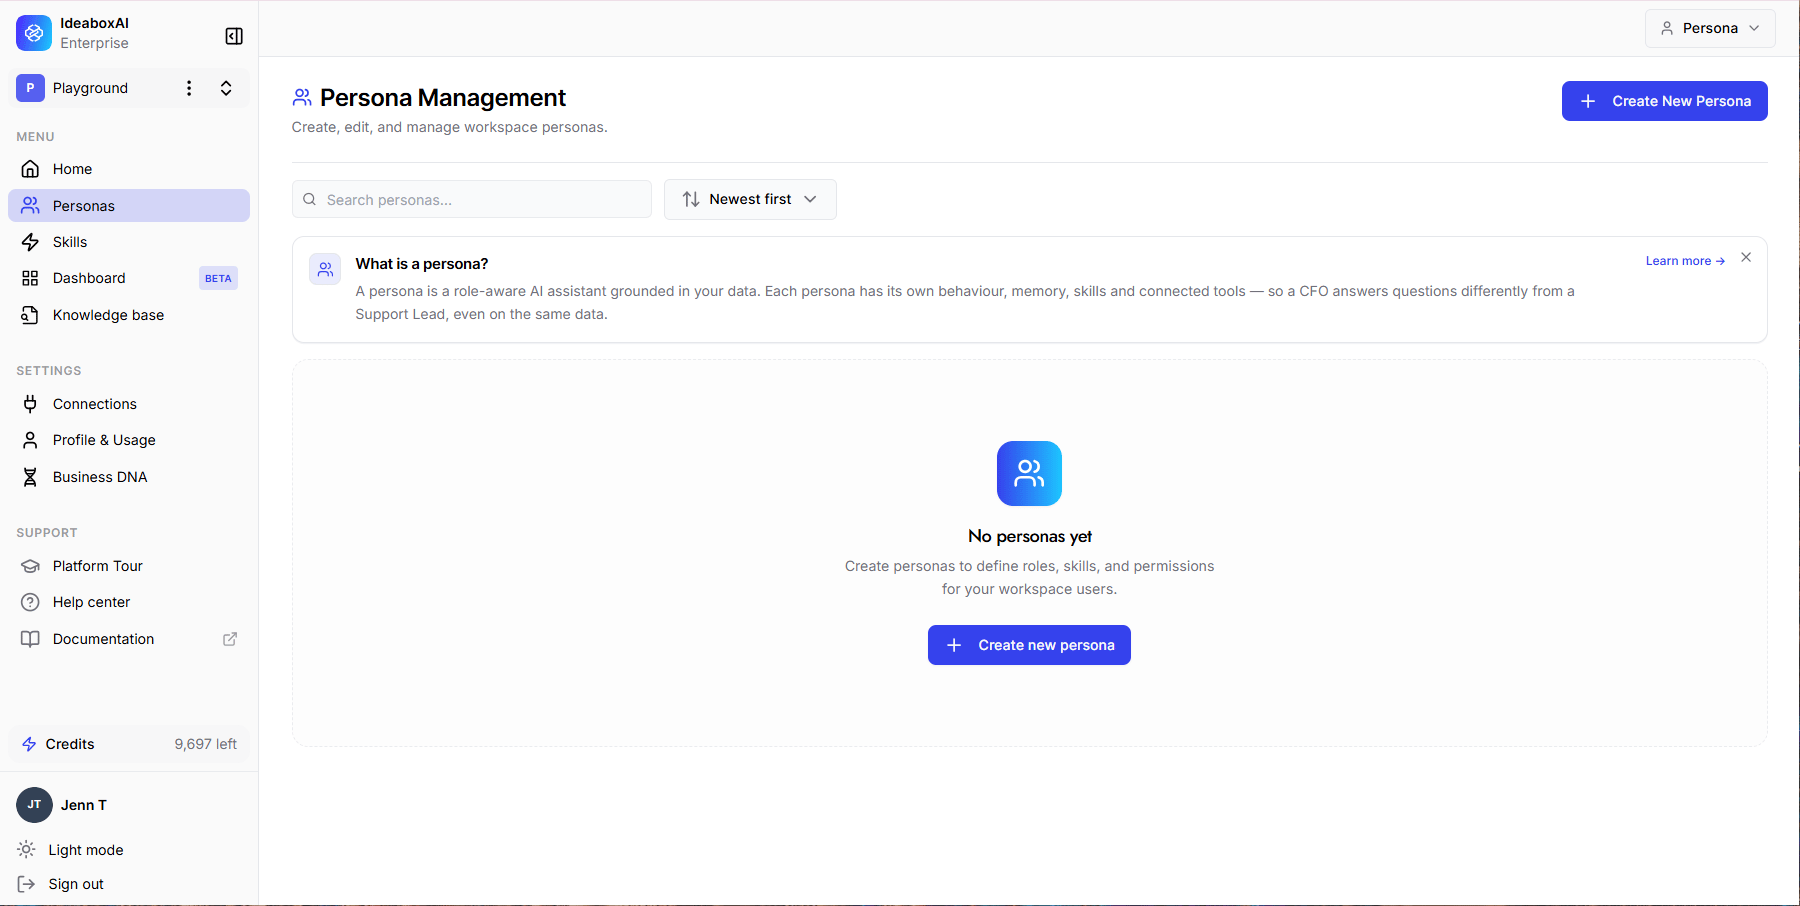
Configure identity and behaviour
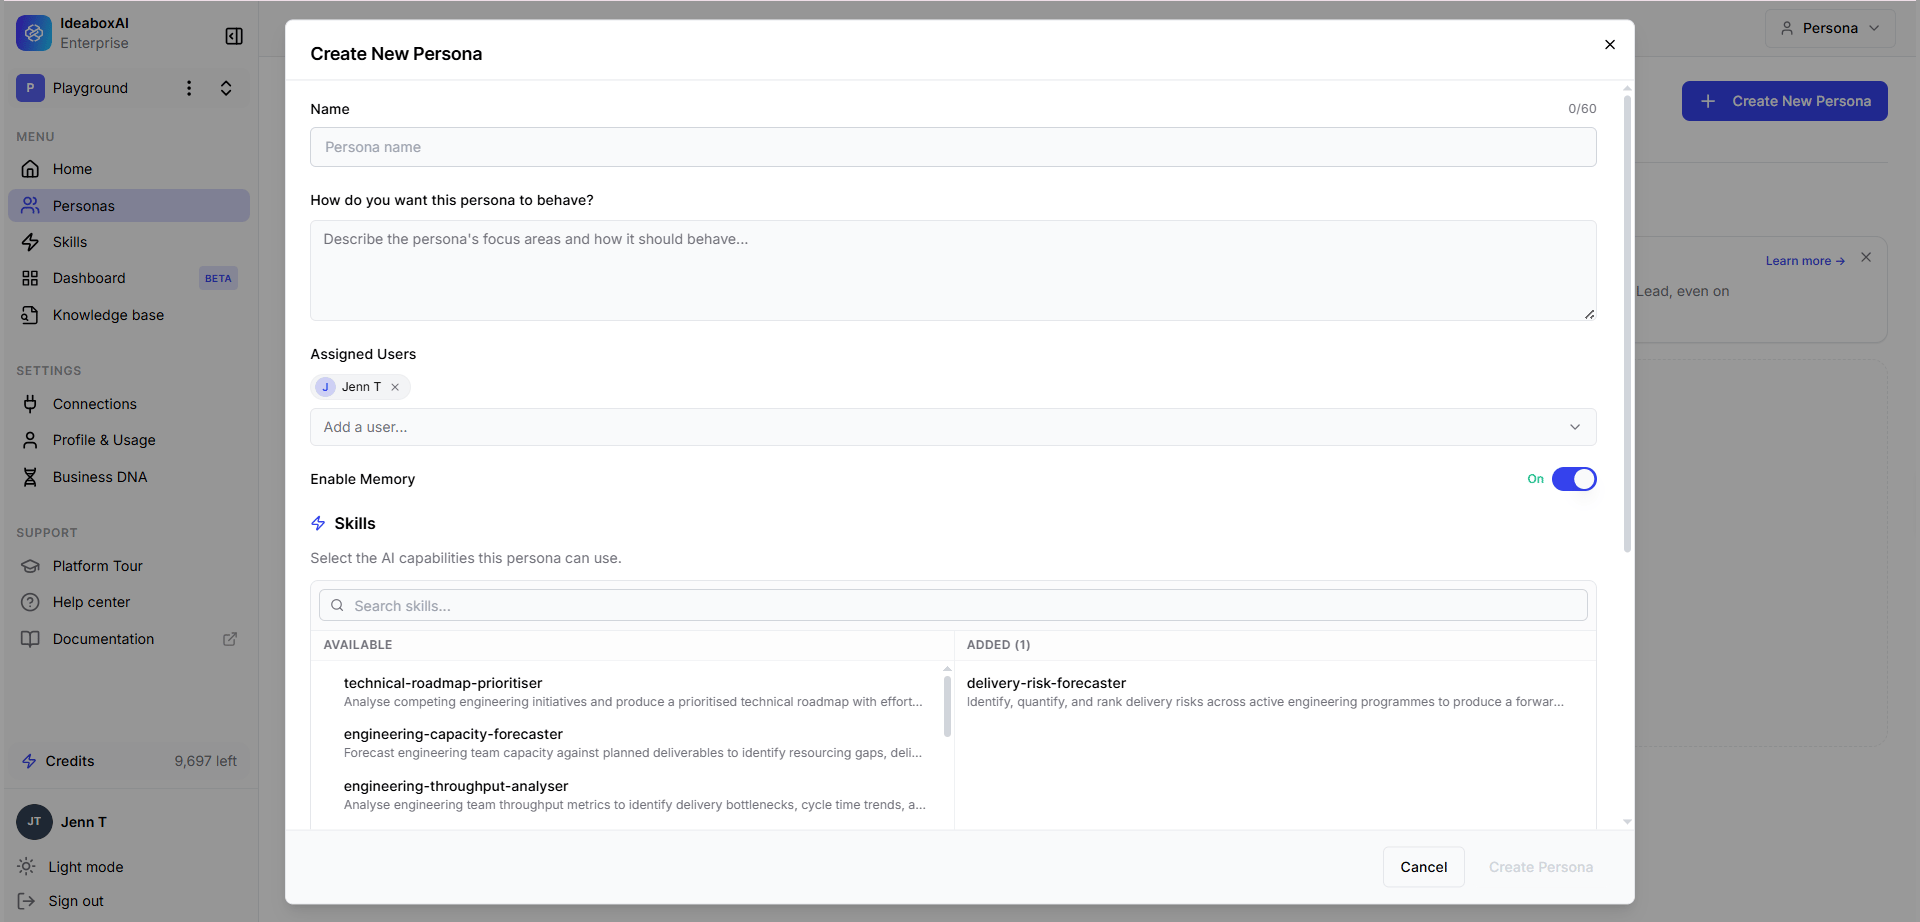
Fill in the following fields:
| Field | Description |
|---|---|
| Name | A short, descriptive persona name, for example, “Sales persona” or “Operations Manager”. |
| How do you want this persona to behave? | Describe the persona’s focus areas and how it should respond. This drives skill selection and tone. |
| Assigned Users | Search and select users who should have access to this persona. |
Enable Memory
Toggle Enable Memory to control whether the persona retains context across sessions.
- ON: The Persona AI remembers previous conversations and builds on prior context.
- OFF: Each session starts fresh with no retained history.
Attach skills and knowledge bases
Further down the Create New Persona modal, you can scope what the persona can do and what it can access.- Skills: Select the AI capabilities this persona can use, search and select skills. Selected skills appear on the right side, and the count is shown (for example, ADDED (2)).
- Knowledge bases: Attach knowledge bases this persona can search, select the data sources the persona can query and it appears on the right side.

Admin: assign users to a persona
Personas are assigned to existing platform users directly from the Persona Management page. Each persona card includes a + Add user action to grant additional users access to that persona.
Assigned users immediately gain access to the persona and see it in their persona dropdown, no page refresh required.