

Start with Auto
Auto puts cost efficiency first. It sends each message to the most cost-efficient model that can handle it well:- Basic models handle simple requests: questions and answers, summaries, short drafts, rewriting, tagging, and extraction.
- Advanced models are used only when the work needs them: data, tools, connectors, analysis, coding, and multi-step reasoning.
Choose a model for your task
If you choose a model yourself, start from your task.Basic models
Basic models are fast and low-cost. Use them for speed and volume.Advanced models
Advanced models handle data, tools, and complex work. Quality scores are out of 100.
Credit use is per 1M tokens:
Manage models in the Admin Console
Admins choose which models people in the workspace can use. In the Admin Console, under Workspace, select AI Models.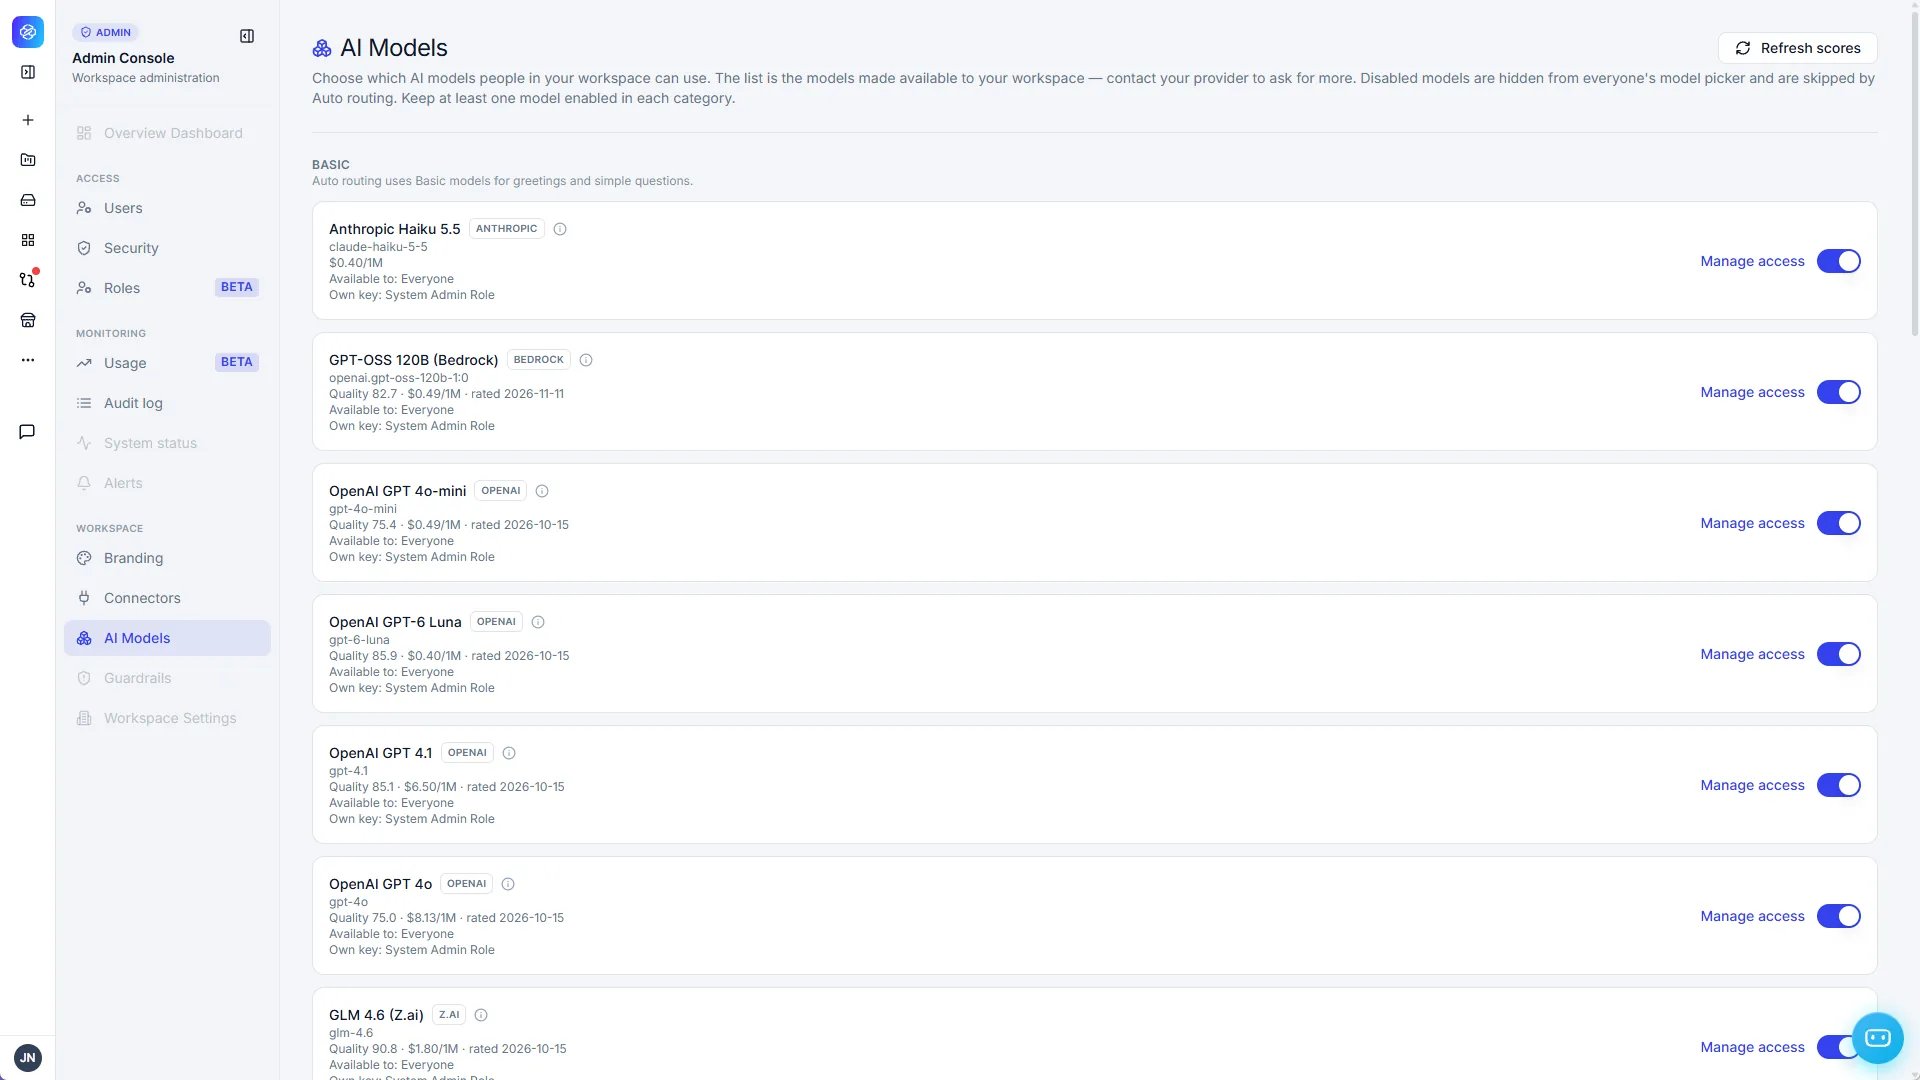
- Turn a model on or off: Use the toggle. Turned-off models are hidden from everyone’s model picker, and Auto skips them.
- Choose who can use a model: Select Manage access. See Choose who can use a model.
- Update quality scores: Select Refresh scores.
Choose who can use a model
1
Open Manage access
On the model’s card, select Manage access. The Manage access dialog opens with Role access at the top.
2
Set role access
Under Role access, select Access for each role that can use the model. Everyone in a selected role gets access by default. Select Own key to let a role use its own provider key for the model. Use Filter roles to find a role.
3
Set user access (optional)
Scroll down to User access. Select or clear Access for individual users. These settings override role access. Users who get access from a role show Inherited.
4
Save
Select Save changes.
Managed credits or your own key
This page reflects models and rates as of November 2026. Models, quality scores, and provider prices change. IdeaBoxAI applies the rate in effect when you use a model.