> ## Documentation Index
> Fetch the complete documentation index at: https://docs.ideaboxai.com/llms.txt
> Use this file to discover all available pages before exploring further.
# Knowledge base connections
> Learn how to connect databases, documents, and cloud warehouses to IdeaBoxAI knowledge bases for AI-powered querying.
A knowledge base connection links IdeaBoxAI to your data. Whether that is a live relational database, a cloud data warehouse, or a library of documents, this guide covers all three types with step-by-step configuration.
## Knowledge base types
IdeaBoxAI supports three knowledge base types. Each type is optimised for a different data format and query pattern.
| KB type | Best for | Supported sources |
| --------------------- | ---------------------------------------------------------------------------------------------- | ------------------------------------------------------------------------------------------------------- |
| **Unstructured data** | Documents, PDFs, and text. Optimised for semantic search and AI reasoning. | Device upload, Google Drive, Confluence, Markdown and text. |
| **Structured data** | Relational databases and spreadsheets. Supports SQL queries, cubes, analytics, and dashboards. | MySQL, PostgreSQL, Snowflake, ClickHouse, SQL Server, Actian, Zen, Zoho Book Analytics, CSV, and Excel. |
## Set up an unstructured data knowledge base
Use this type for documents, playbooks, runbooks, and any content intended for semantic search.
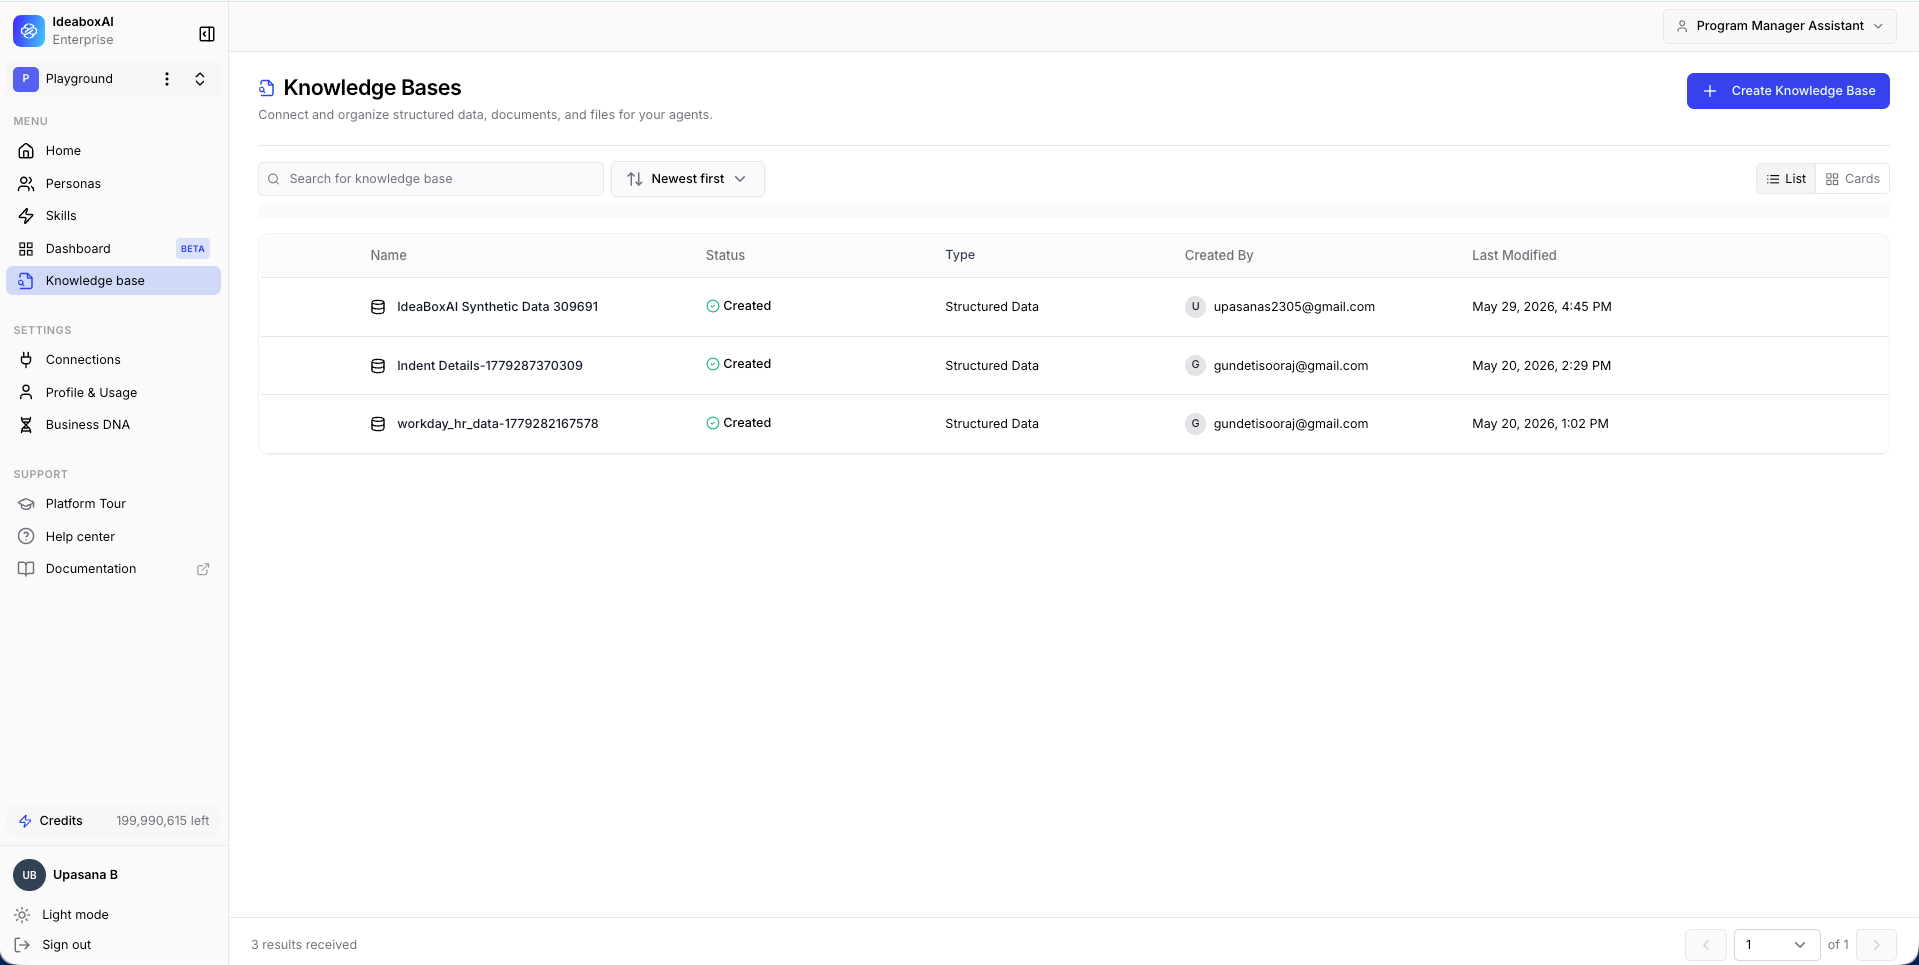
In the IdeaBoxAI sidebar, click **Knowledge Bases**. The dashboard shows all existing knowledge bases with name, status, type, creator, and last modified date.
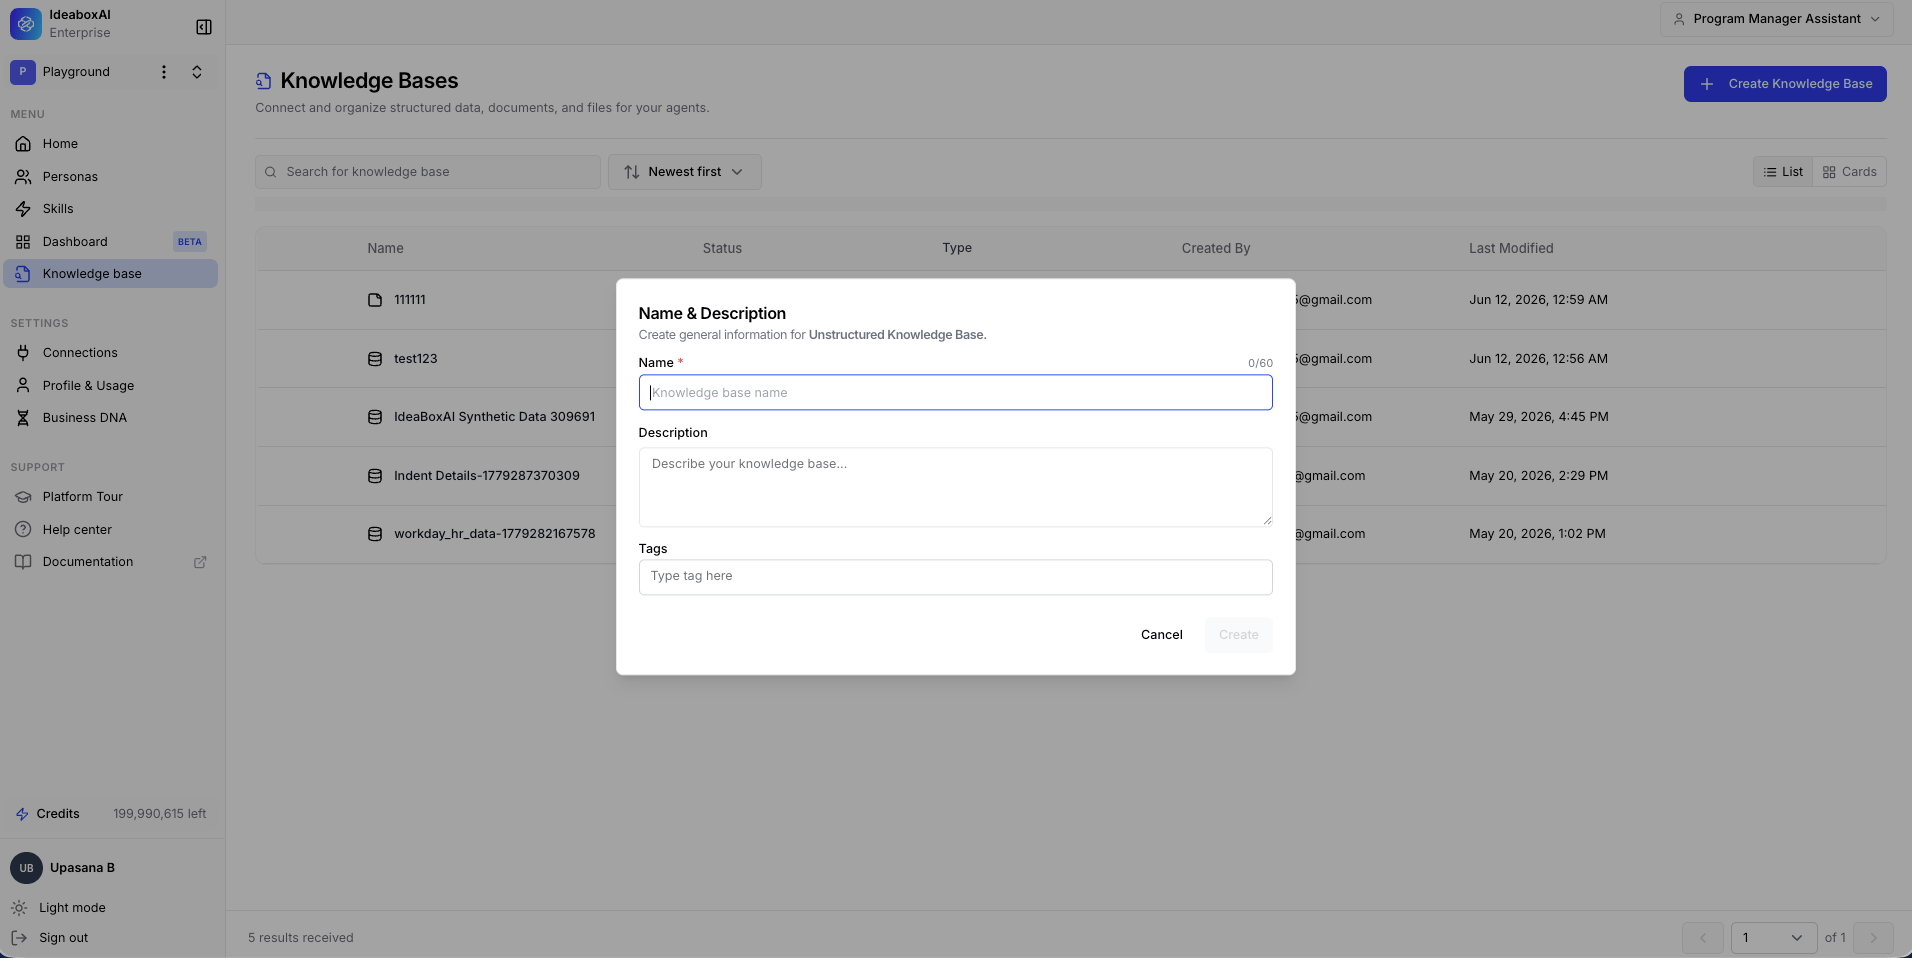
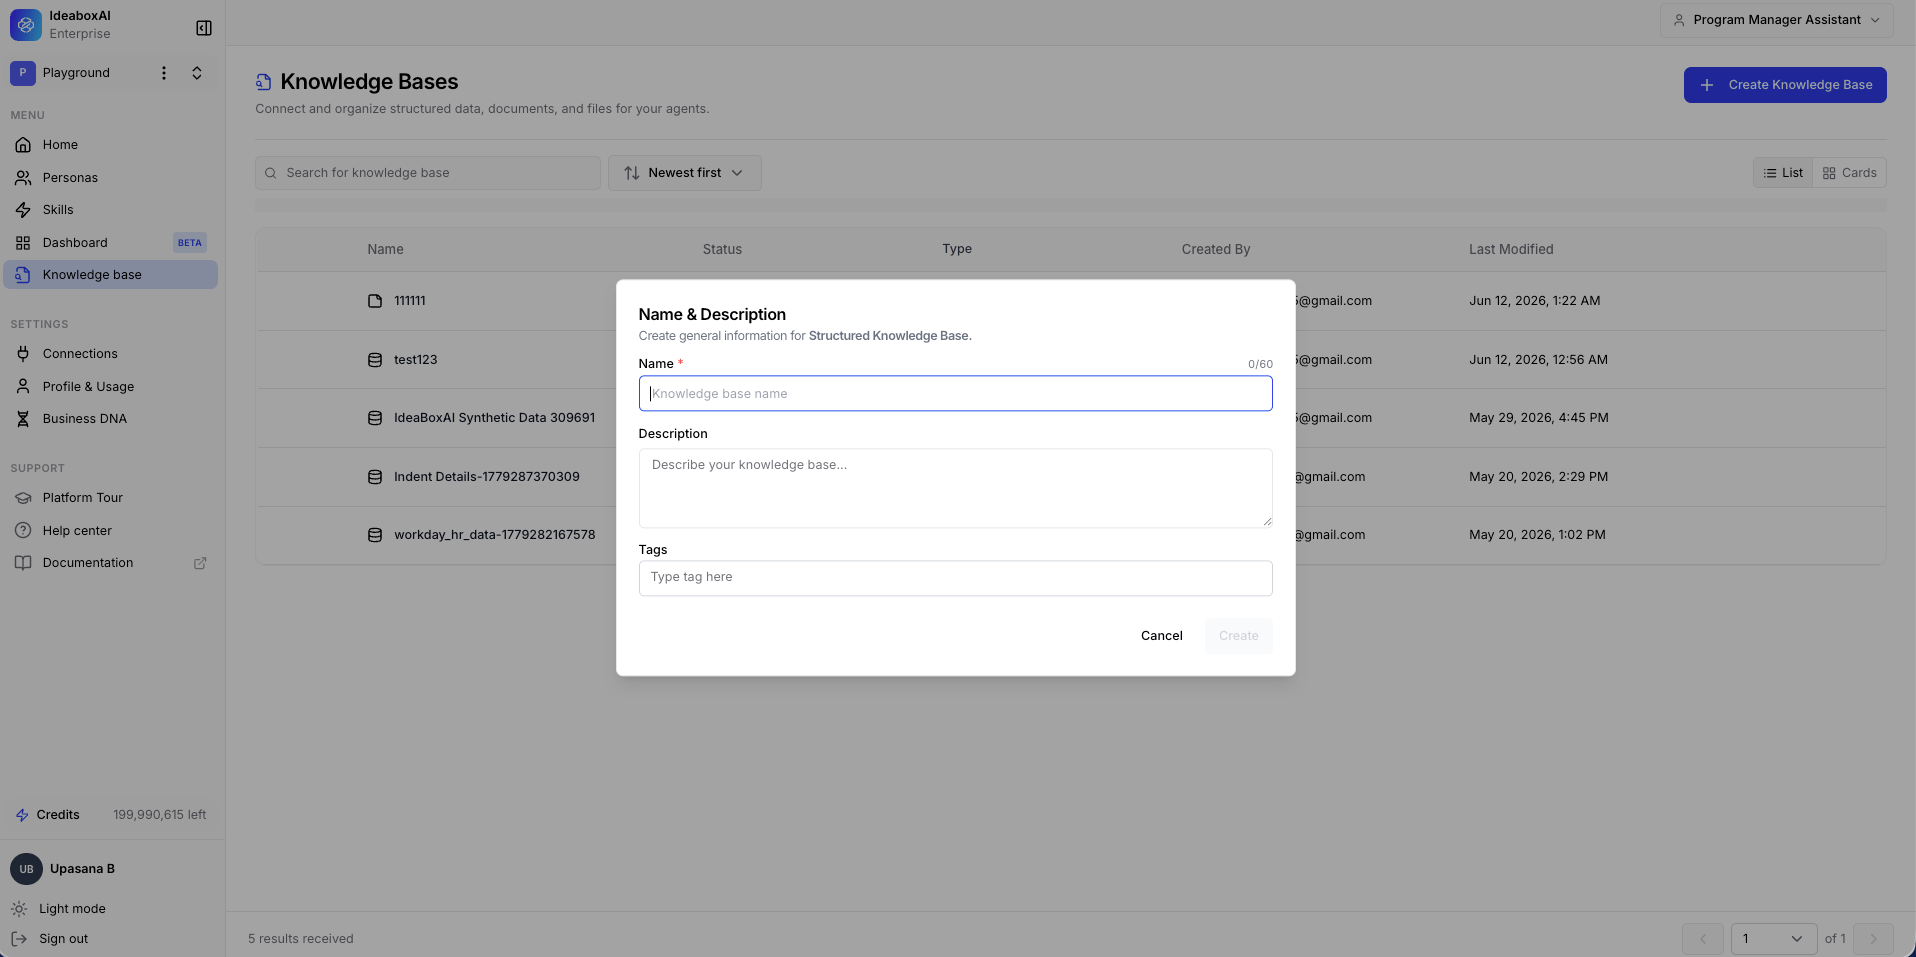
 Click **+ Create Knowledge Base**. A type selection modal appears. Select **Unstructured Data** and click **Next**. The Name and Description modal appears. Fill in the following fields:
* **Name** (required): Use a clear naming convention, for example "Sales Playbooks 2026" or "RFP Answer Library".
* **Description**: Explain what data this knowledge base contains and which personas will use it.
* **Tags**: Add domain or team tags, for example "sales", "onboarding", "CRE".
Click **Create**.
Click **+ Create Knowledge Base**. A type selection modal appears. Select **Unstructured Data** and click **Next**. The Name and Description modal appears. Fill in the following fields:
* **Name** (required): Use a clear naming convention, for example "Sales Playbooks 2026" or "RFP Answer Library".
* **Description**: Explain what data this knowledge base contains and which personas will use it.
* **Tags**: Add domain or team tags, for example "sales", "onboarding", "CRE".
Click **Create**.
 The empty Data Source panel appears. Click **+ Add Data** to reveal four options.
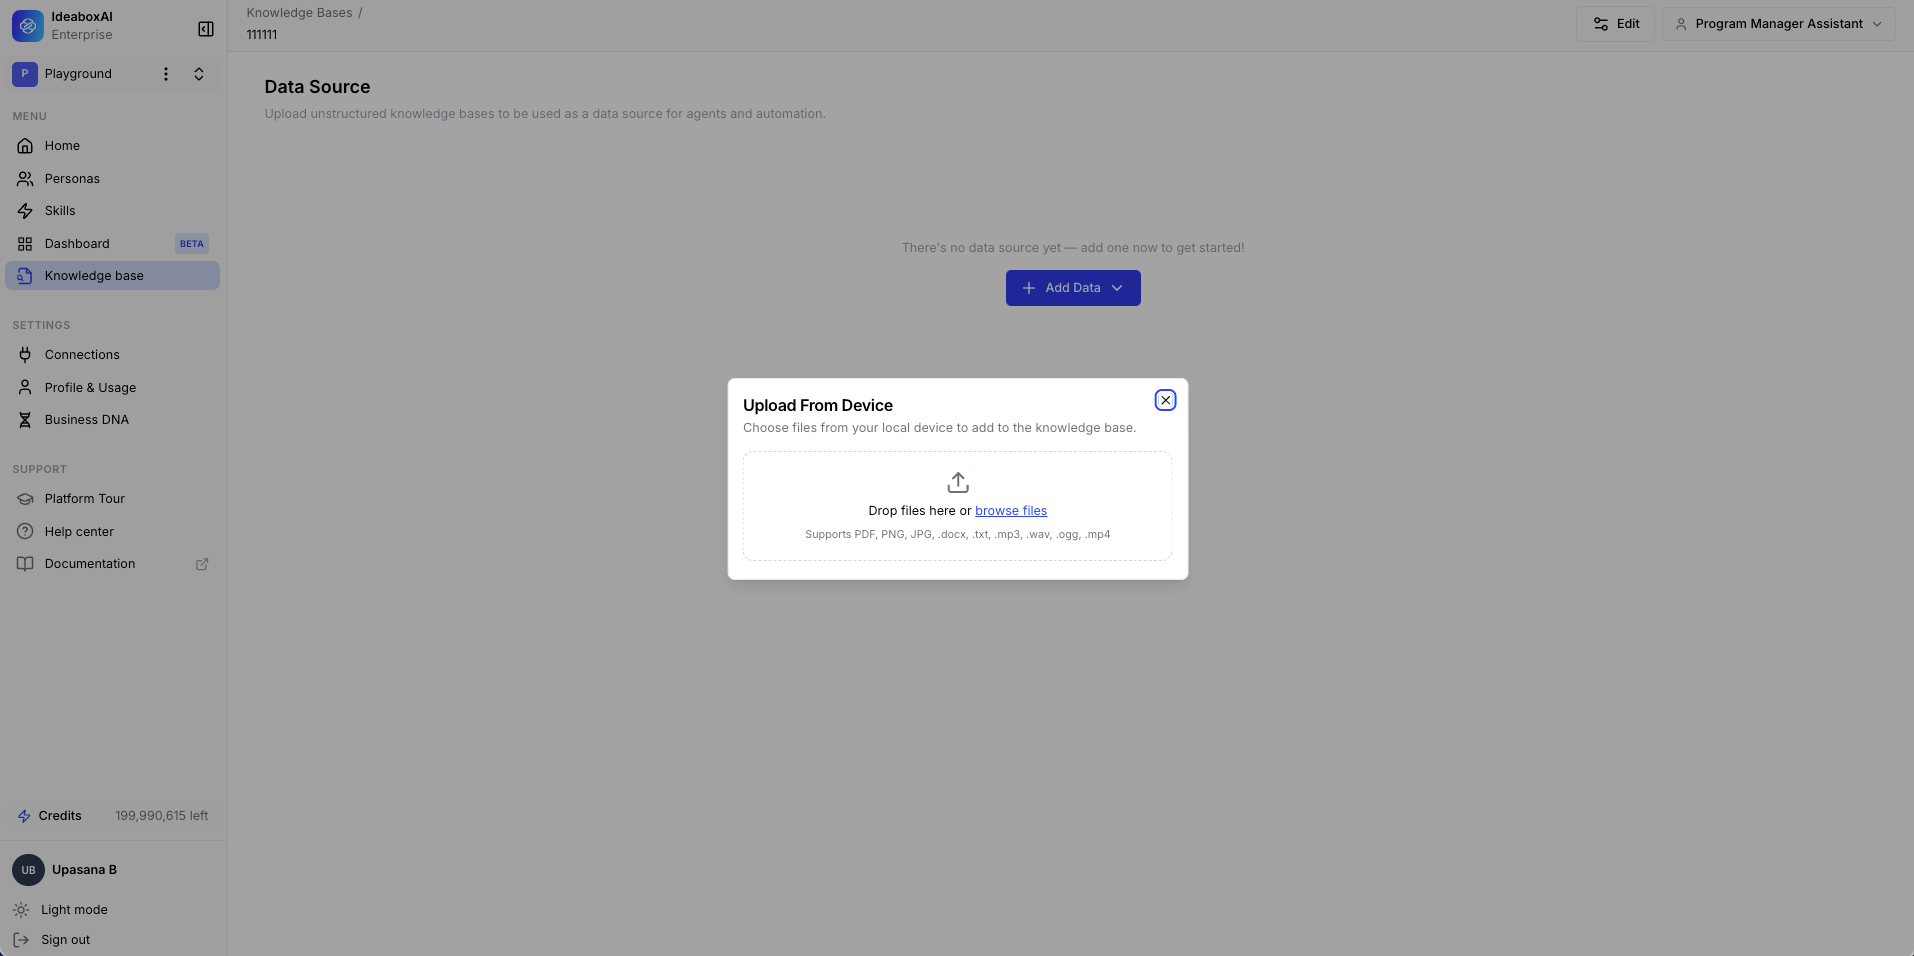
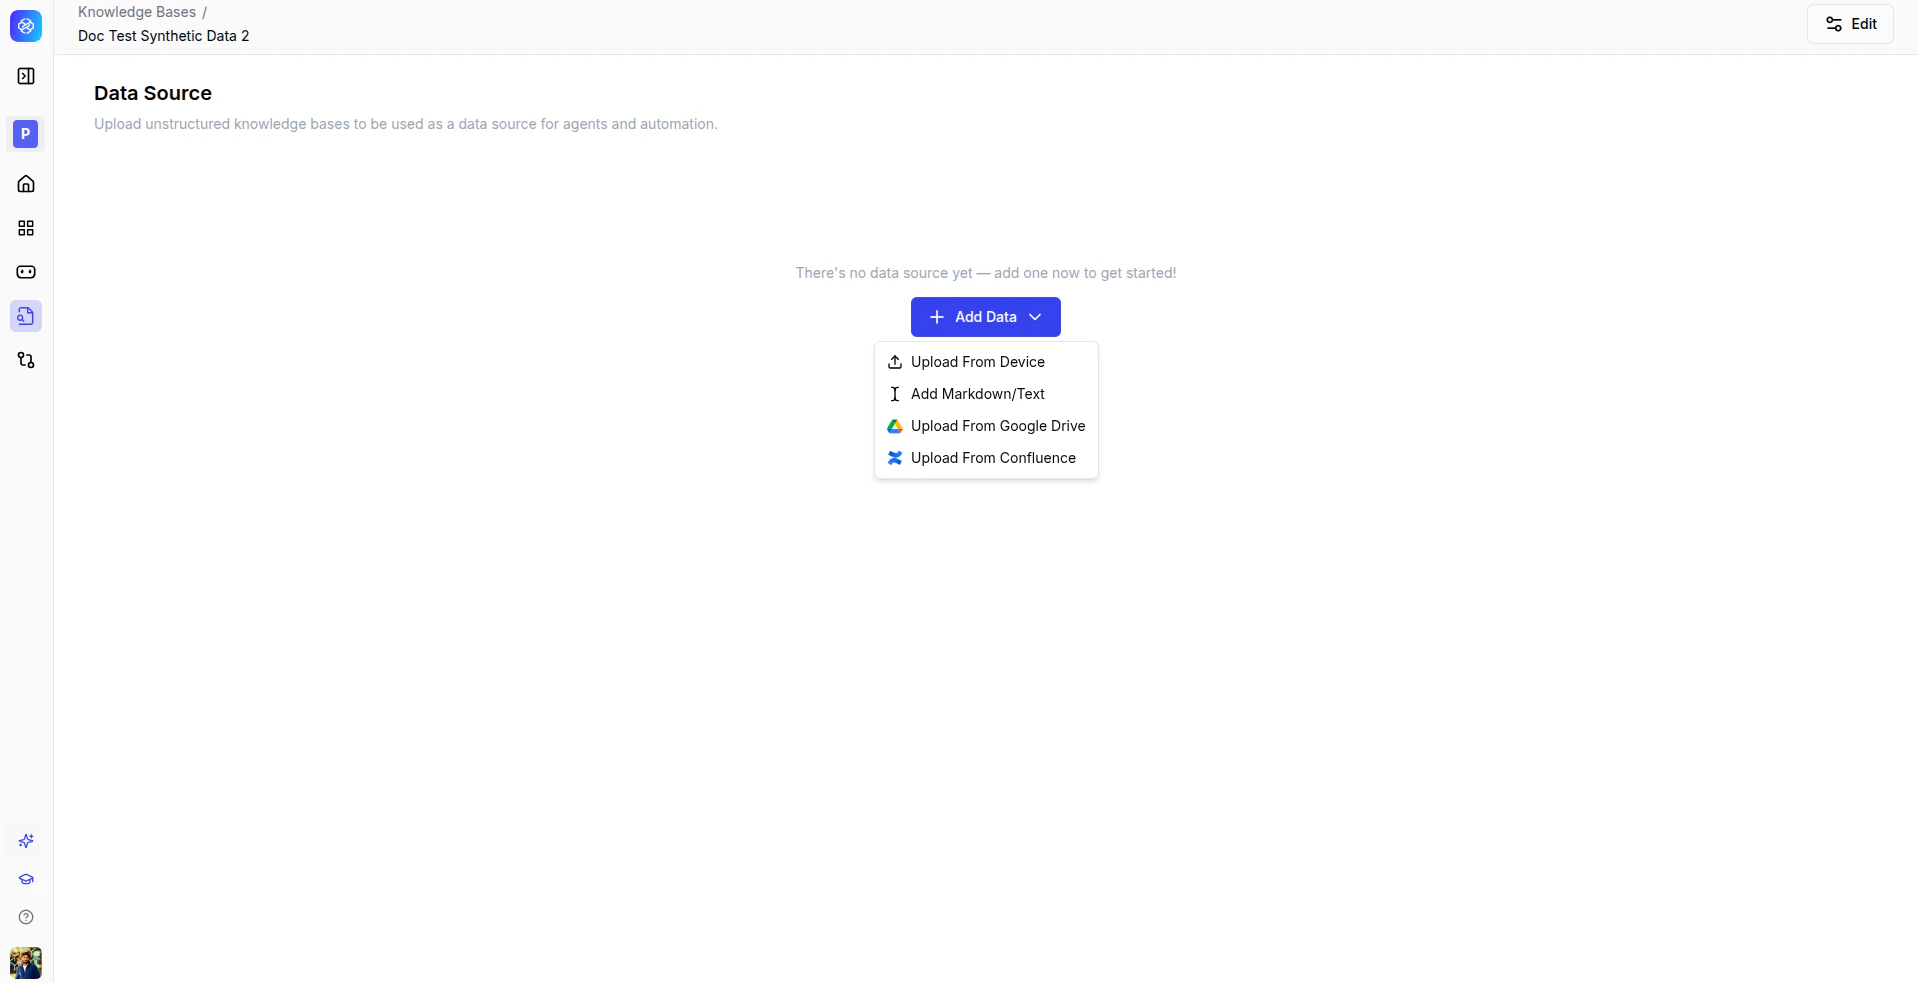 * **Upload From Device**: Drop files or browse to select them. Supports PDF, PNG, JPG, DOCX, TXT, MP3, WAV, OGG, and MP4. Batch upload is supported.
* **Add Markdown/Text**: Paste or type content directly into the editor. Useful for SOPs, playbooks, or knowledge articles without a file.
* **Upload From Google Drive**: Authenticate with your Google account, browse your Drive folders, and select files or folders to import.
* **Upload From Confluence**: Authenticate with your Confluence workspace, browse spaces and pages, and select content to import.
The following screenshot shows the Upload From Device modal with its drag-and-drop area.
* **Upload From Device**: Drop files or browse to select them. Supports PDF, PNG, JPG, DOCX, TXT, MP3, WAV, OGG, and MP4. Batch upload is supported.
* **Add Markdown/Text**: Paste or type content directly into the editor. Useful for SOPs, playbooks, or knowledge articles without a file.
* **Upload From Google Drive**: Authenticate with your Google account, browse your Drive folders, and select files or folders to import.
* **Upload From Confluence**: Authenticate with your Confluence workspace, browse spaces and pages, and select content to import.
The following screenshot shows the Upload From Device modal with its drag-and-drop area.
 After upload, each file appears in the data source table with columns for file name, status, file type, and size. The status transitions from **Processing** to **Processed**.
 Wait for all files to show **Processed** before connecting this knowledge base to an agent or automation. If a file shows a failure status, remove it and re-upload.
 Ensure documents are machine-readable text PDFs (not scanned images) for best processing results. Re-index data after any bulk upload.
## Set up a structured data knowledge base
Use this type for relational databases, spreadsheets, or any structured data source.
Click **+ Create Knowledge Base**. Select **Structured Data**. Enter a name, description, and tags in the Name and Description modal, then click **Create**.
Ensure documents are machine-readable text PDFs (not scanned images) for best processing results. Re-index data after any bulk upload.
## Set up a structured data knowledge base
Use this type for relational databases, spreadsheets, or any structured data source.
Click **+ Create Knowledge Base**. Select **Structured Data**. Enter a name, description, and tags in the Name and Description modal, then click **Create**.
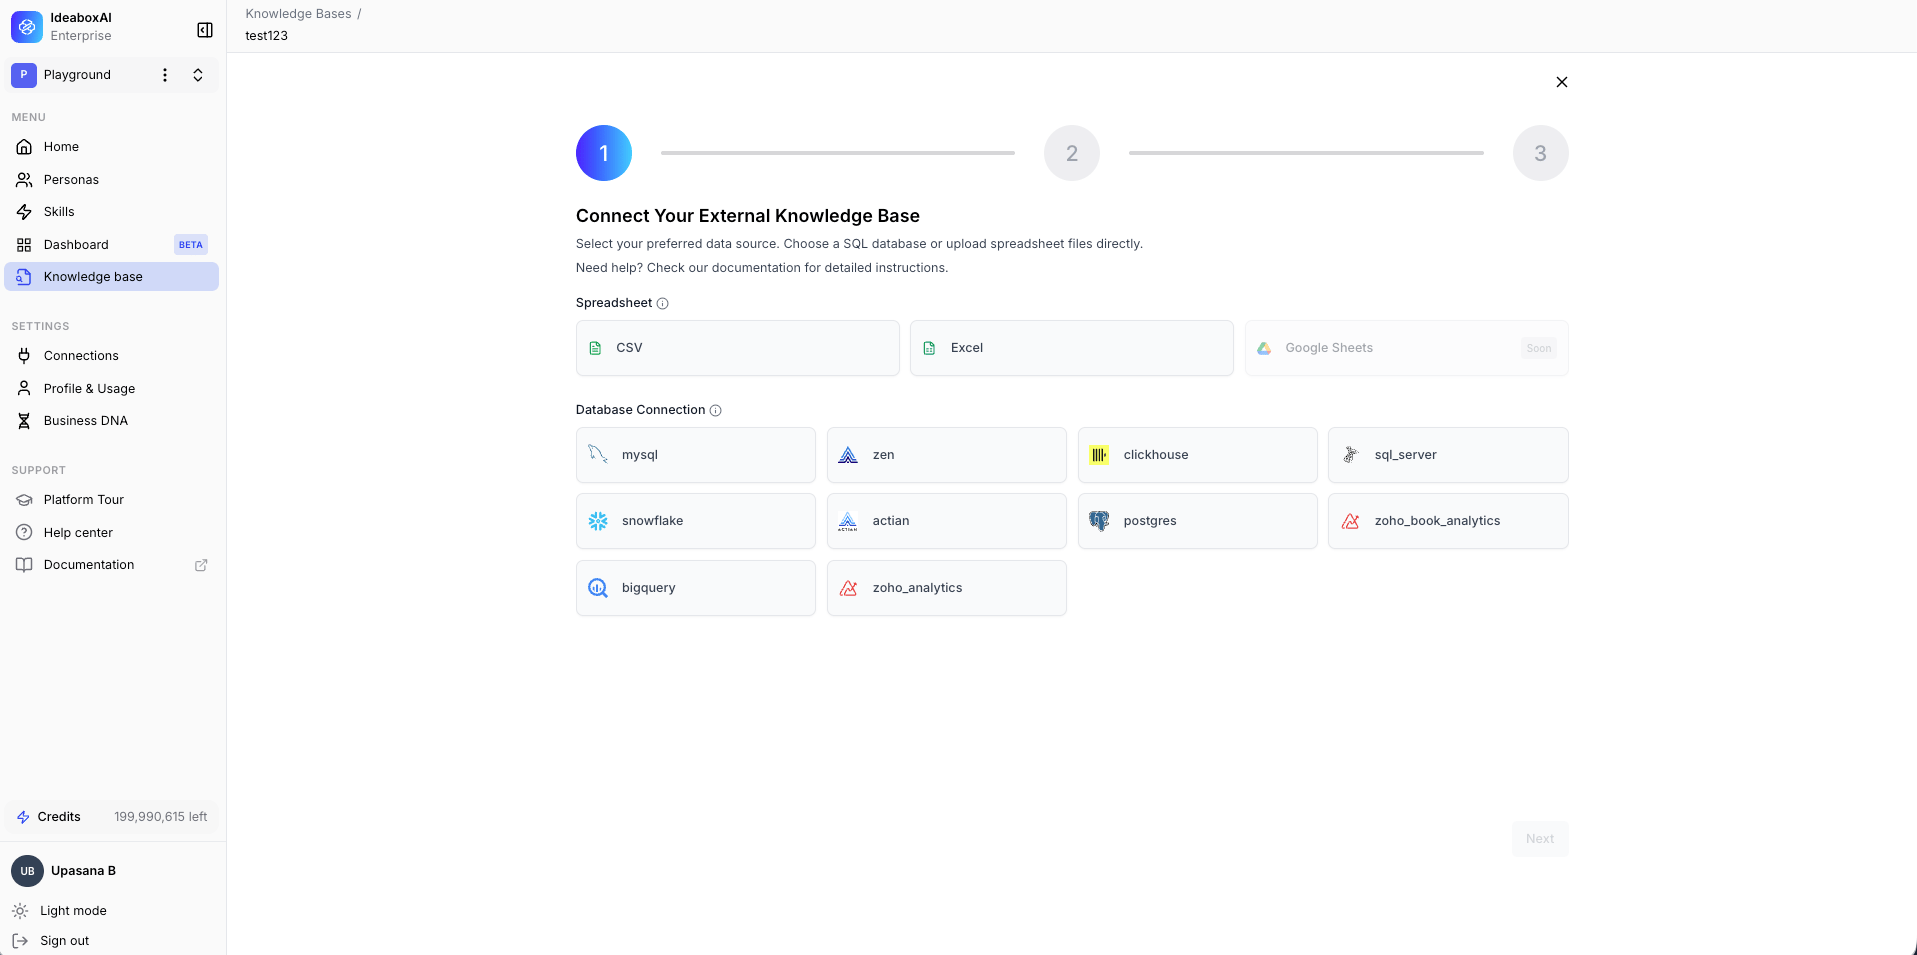
 The Connect Your External Knowledge Base page appears. Choose from two categories:
**Spreadsheet**: CSV, Excel, or Google Sheets *(coming soon)*.
**Database Connection**: MySQL, Zen, ClickHouse, SQL Server, PostgreSQL, Actian, Zoho Book Analytics, or Snowflake.
The Connect Your External Knowledge Base page appears. Choose from two categories:
**Spreadsheet**: CSV, Excel, or Google Sheets *(coming soon)*.
**Database Connection**: MySQL, Zen, ClickHouse, SQL Server, PostgreSQL, Actian, Zoho Book Analytics, or Snowflake.
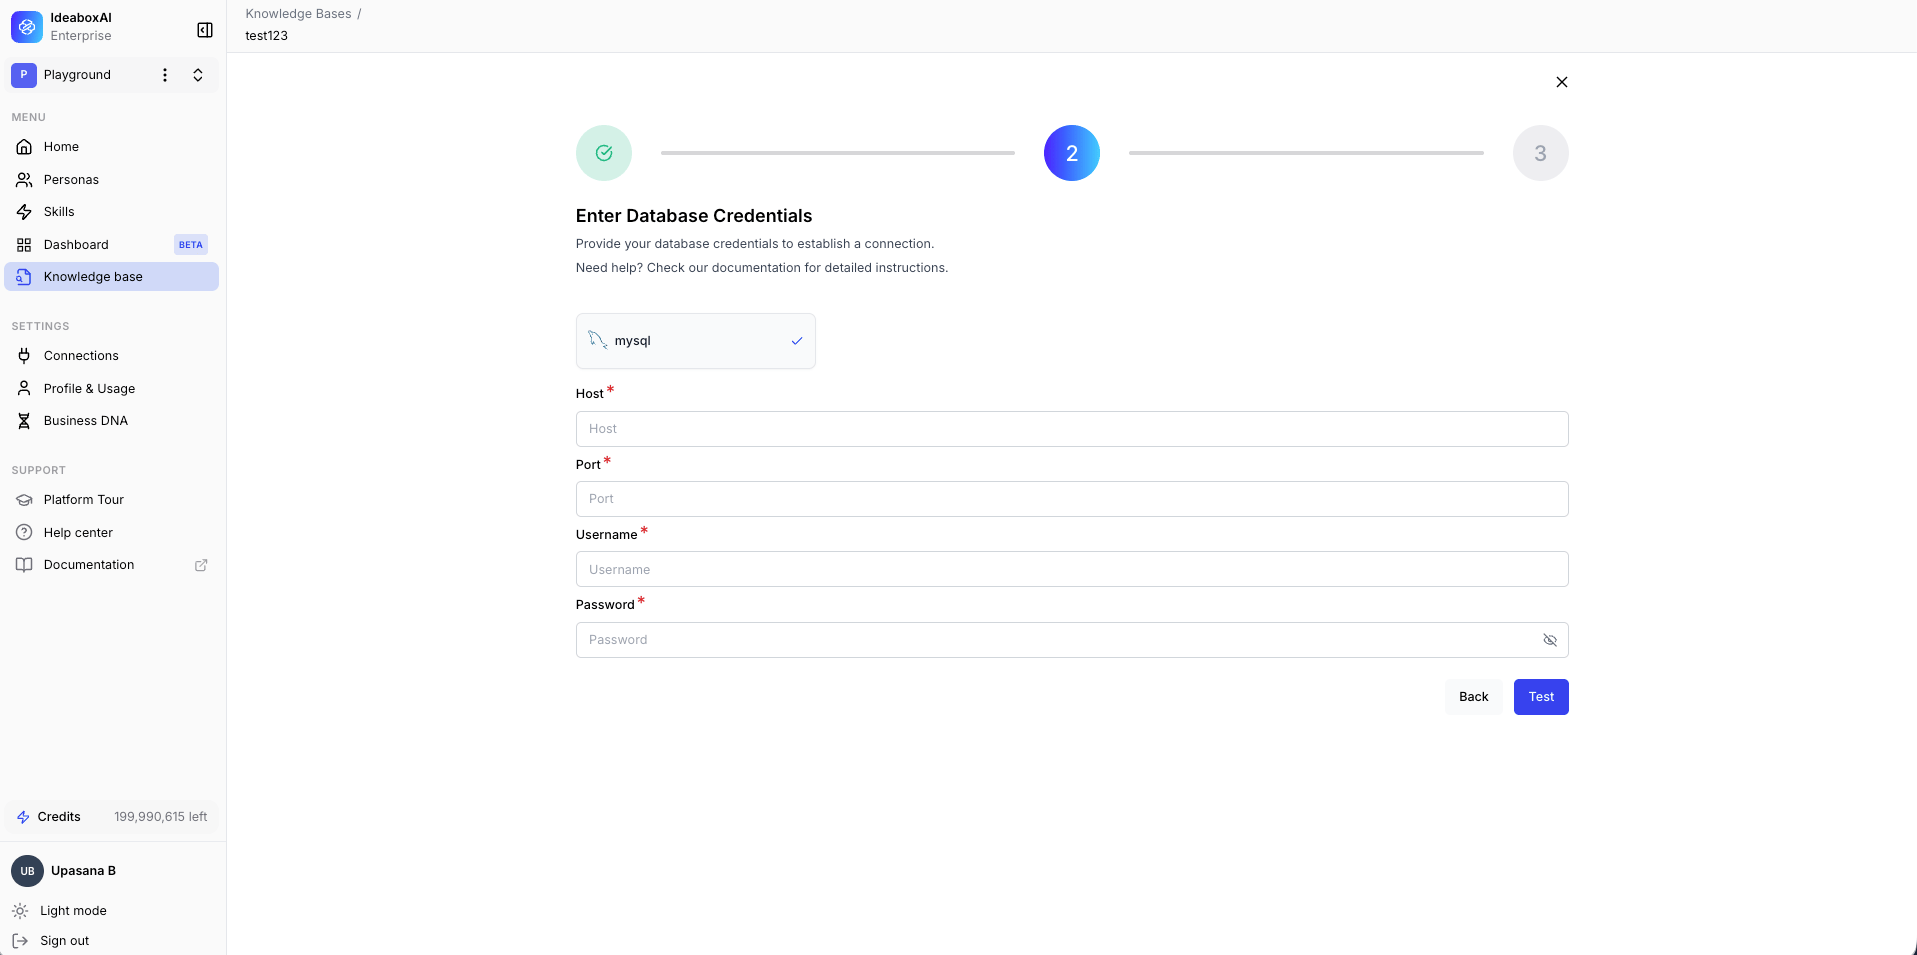
 If you selected a database connection, the Enter Database Credentials form appears. Fill in the following fields:
* **Host** (required): Your database server address or IP.
* **Port** (required): Database port (PostgreSQL: 5432, MySQL: 3306, Snowflake: 443).
* **Username** (required): A database user with read access.
* **Password** (required): The database password.
Click **Test** to verify the connection.
If you selected a database connection, the Enter Database Credentials form appears. Fill in the following fields:
* **Host** (required): Your database server address or IP.
* **Port** (required): Database port (PostgreSQL: 5432, MySQL: 3306, Snowflake: 443).
* **Username** (required): A database user with read access.
* **Password** (required): The database password.
Click **Test** to verify the connection.
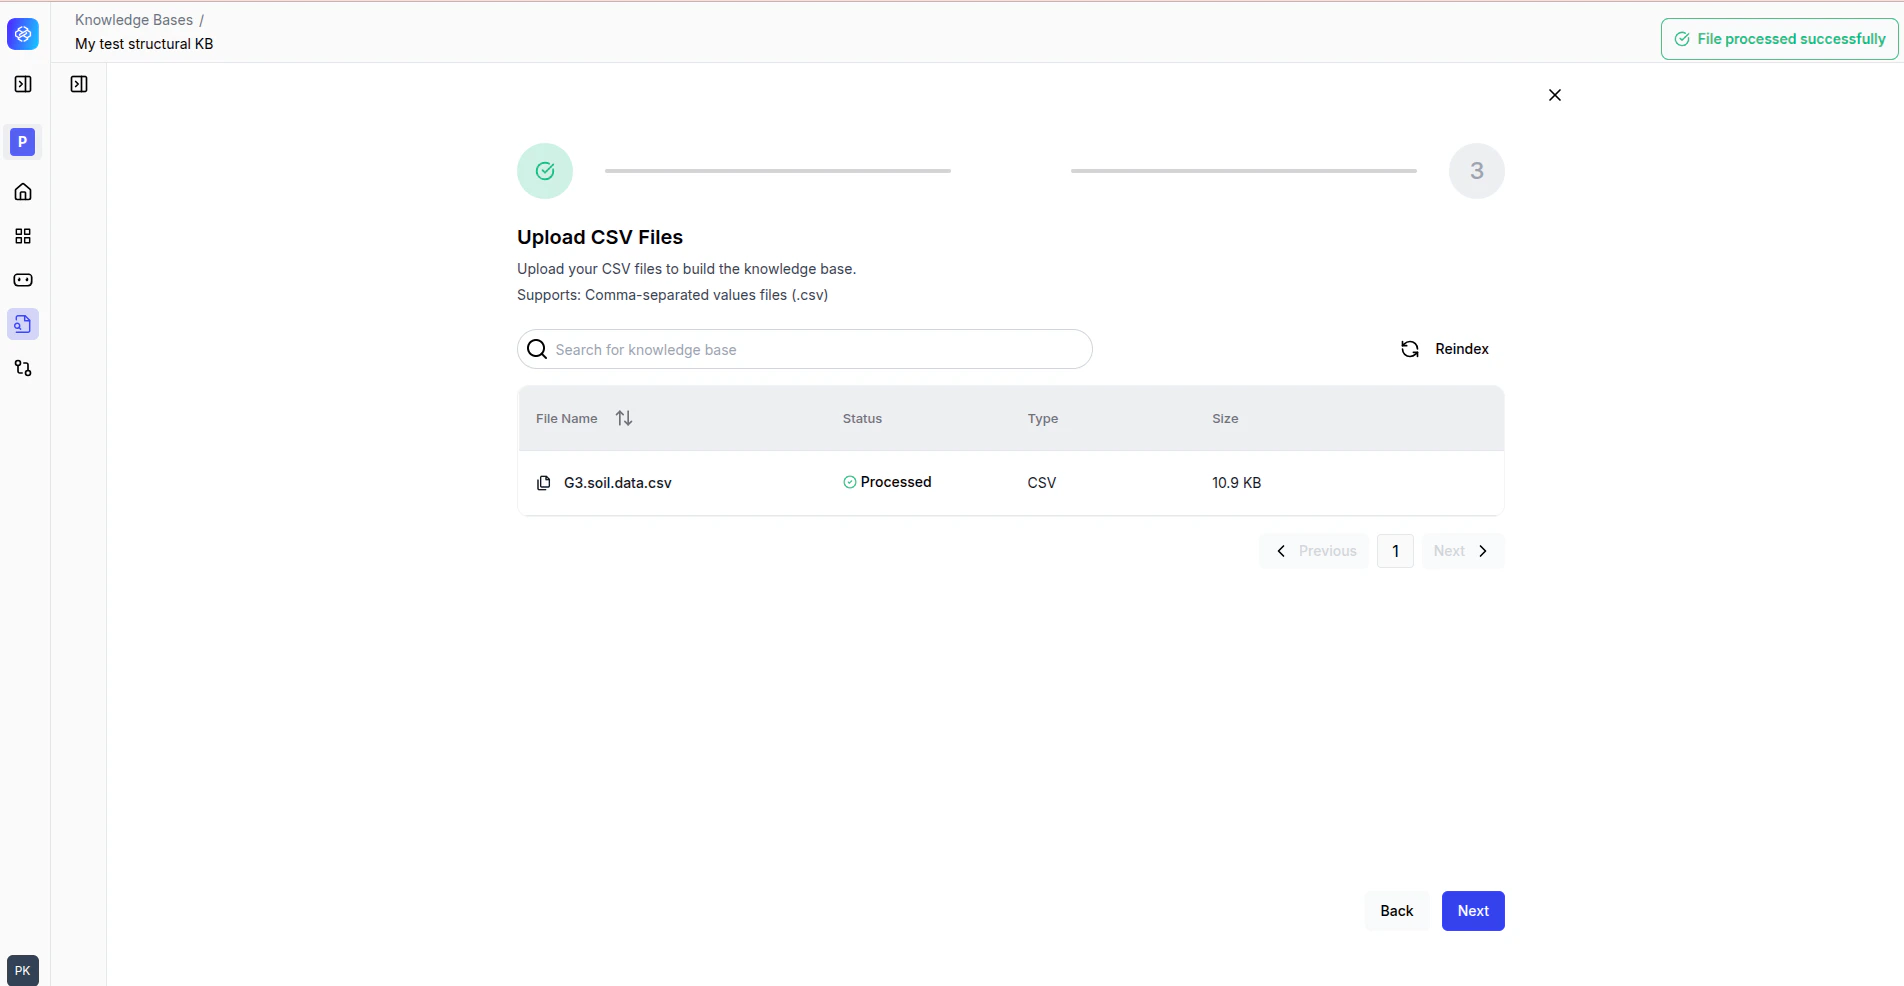
 If you selected CSV, the Upload CSV Files page appears. Click **+ Upload Files** to select CSV files from your device. Wait for all files to show **Processed**.
 After a successful connection, IdeaBoxAI imports your database schema. The Datasets view shows:
* **Left sidebar**: All database tables (Data Sets).
* **Centre panel**: Table relationships, joins, and column details.
* **Options**: Enhance with AI, Add Semantics, and Define Relationships.
Browse the tables and confirm the schema looks correct. Use **Define Relationships** to specify table joins.
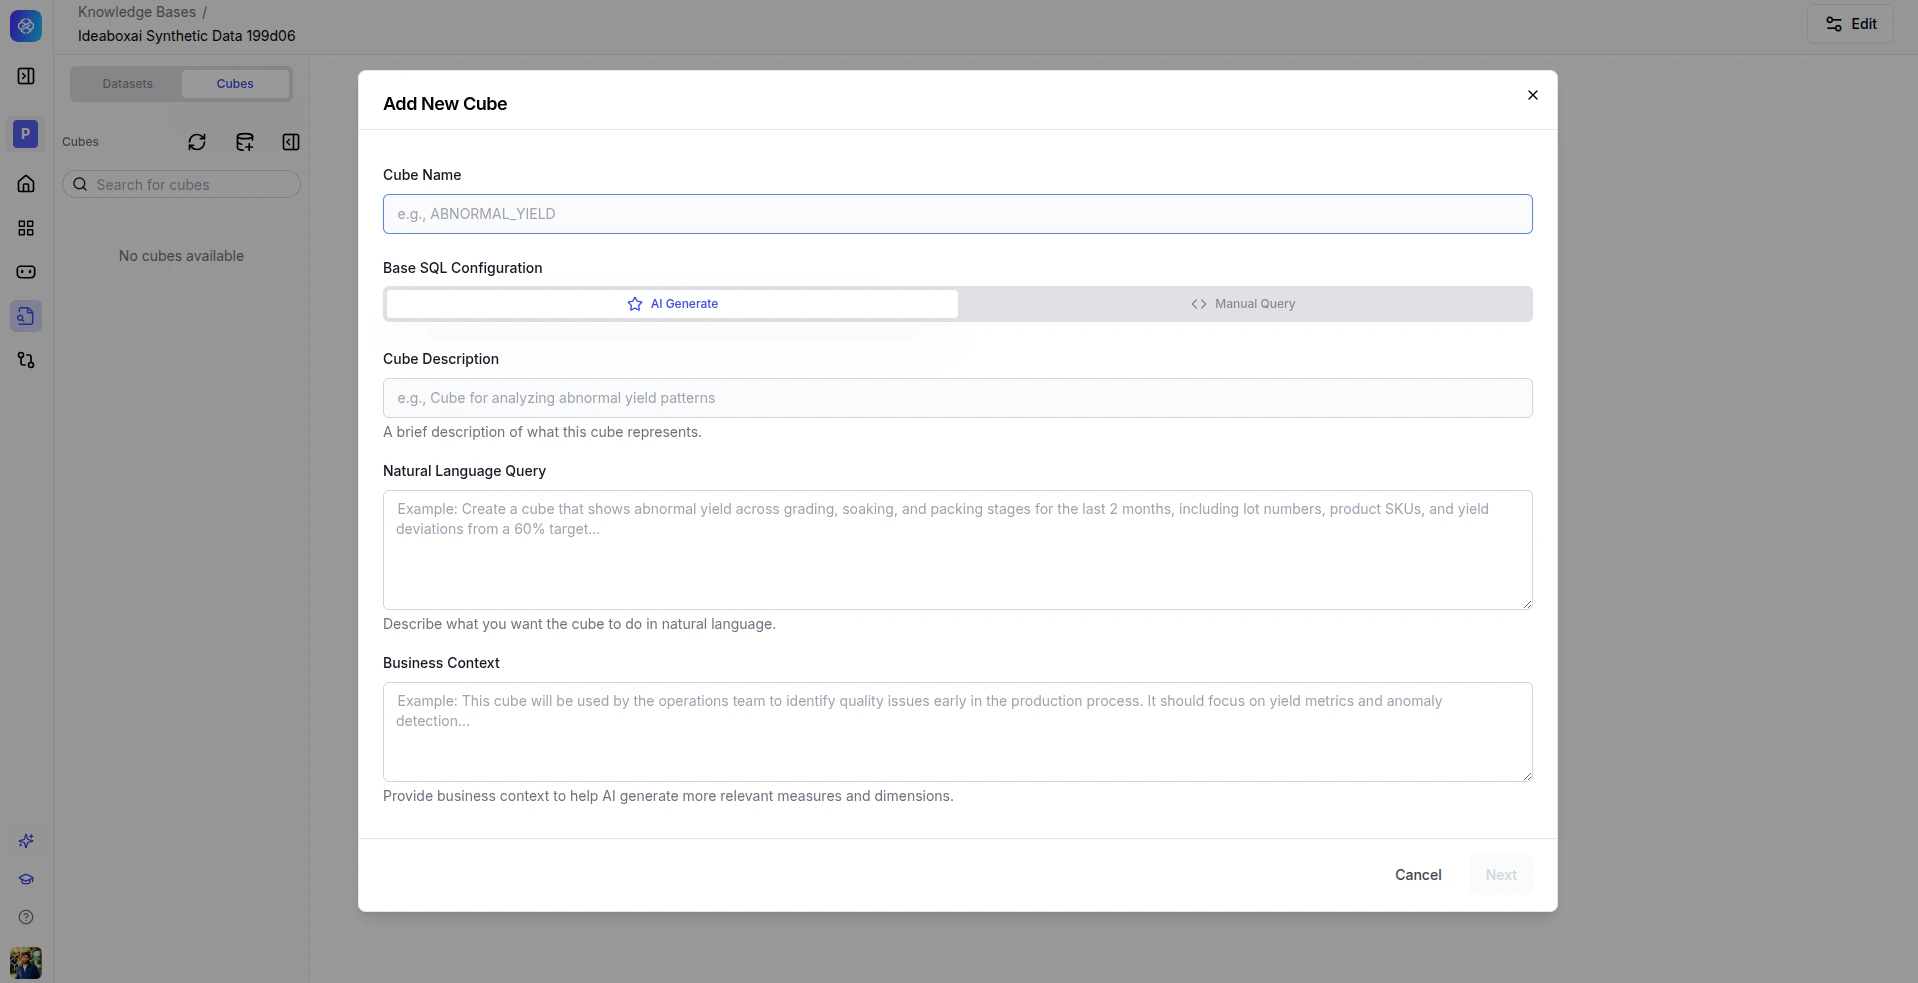
Cubes sit on top of your raw tables and define metrics (measures) and groupings (dimensions) for AI queries. Navigate to the **Cubes** tab and click **+ Add Cube** to open the Add New Cube modal.
**Option A, AI Generate** (recommended for most cases):
Enter a cube name, cube description, natural language query describing the analytics you want, and business context. Click **Generate**. The AI writes the SQL, measures, and dimensions.
After a successful connection, IdeaBoxAI imports your database schema. The Datasets view shows:
* **Left sidebar**: All database tables (Data Sets).
* **Centre panel**: Table relationships, joins, and column details.
* **Options**: Enhance with AI, Add Semantics, and Define Relationships.
Browse the tables and confirm the schema looks correct. Use **Define Relationships** to specify table joins.
Cubes sit on top of your raw tables and define metrics (measures) and groupings (dimensions) for AI queries. Navigate to the **Cubes** tab and click **+ Add Cube** to open the Add New Cube modal.
**Option A, AI Generate** (recommended for most cases):
Enter a cube name, cube description, natural language query describing the analytics you want, and business context. Click **Generate**. The AI writes the SQL, measures, and dimensions.
 **Option B, Manual Query** (for advanced users):
Enter a cube name, write custom SQL in the SQL Query editor, then define measures and dimensions manually using **+ Add Measure** and **+ Add Dimension**.
**Option B, Manual Query** (for advanced users):
Enter a cube name, write custom SQL in the SQL Query editor, then define measures and dimensions manually using **+ Add Measure** and **+ Add Dimension**.
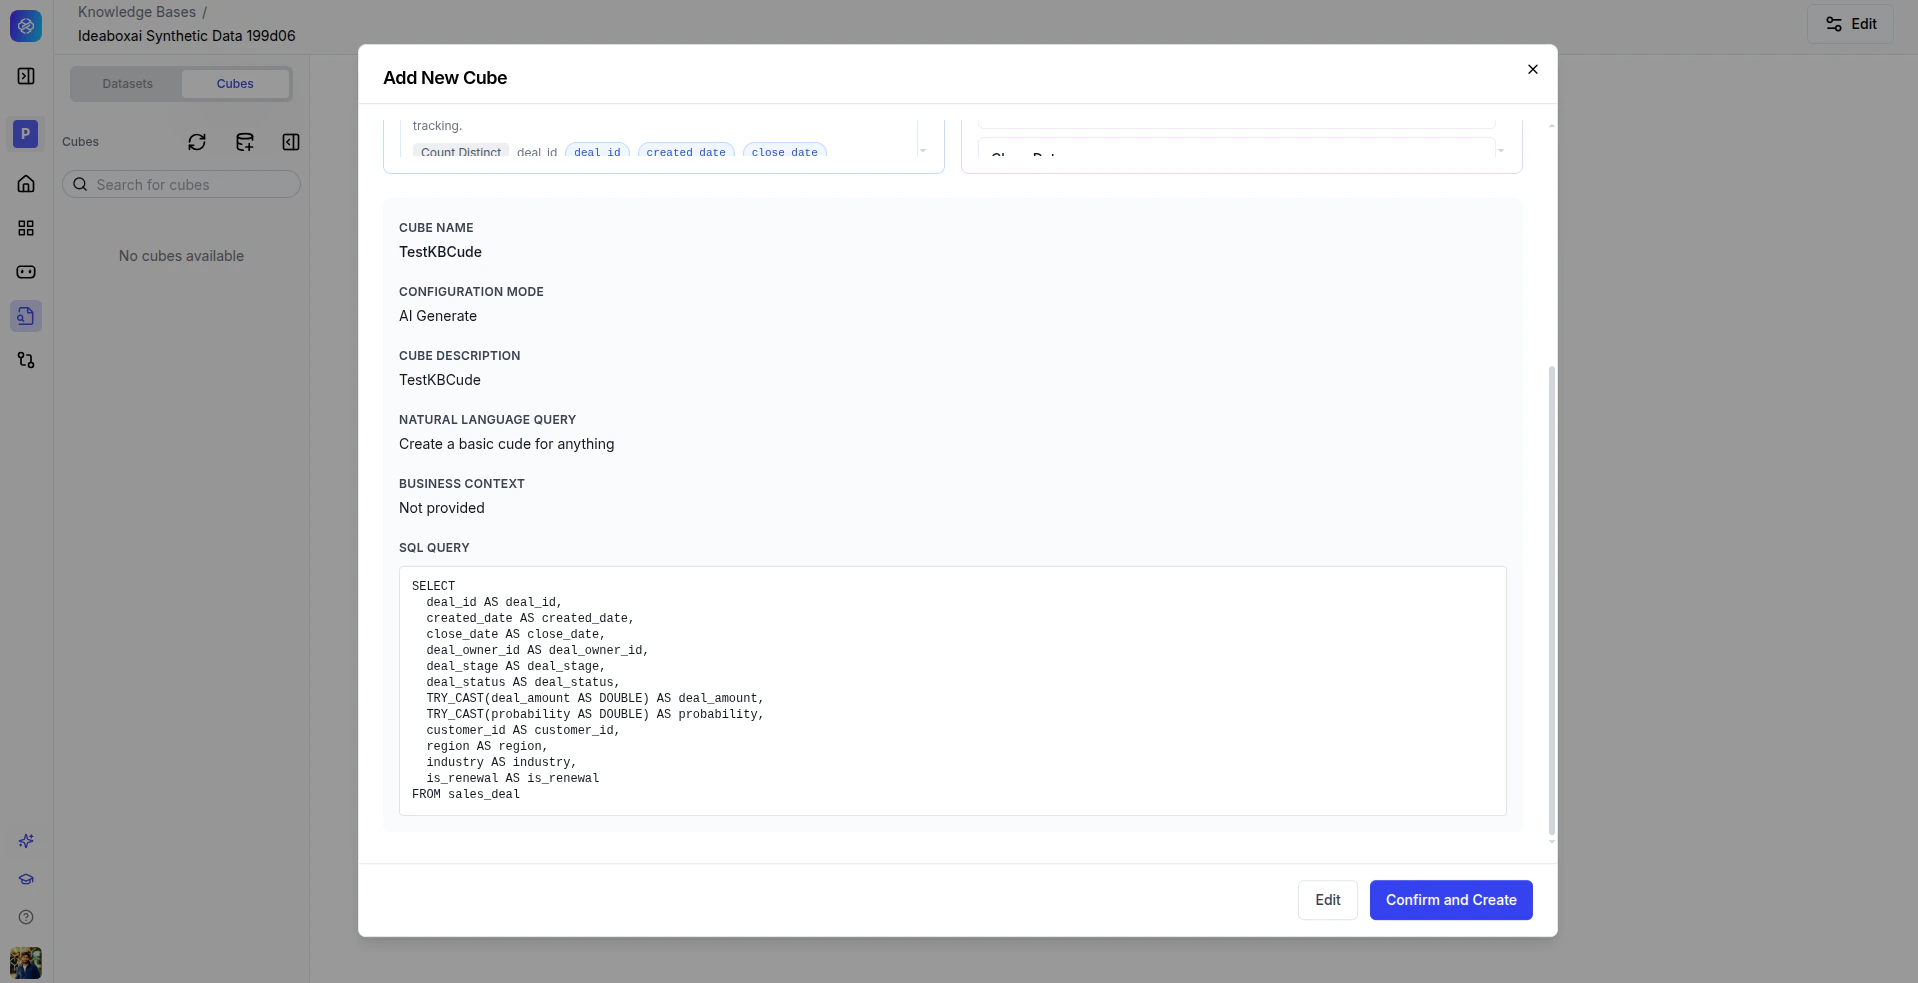 Click **Save Cube**.
In the cube configuration panel, select measures, dimensions, and filters, then click **Run Query**. Results appear in the Results tab. Also check the **Generated SQL** tab to inspect the query and the **REST API** tab for programmatic access. Validate results against your source data.
Navigate to **Agents**, select your agent, open the **Configuration** tab, select this knowledge base from the **Knowledge Base** dropdown, and click **Save**. The agent can now query your structured data using natural language.
Always test the generated SQL in the cube query panel before connecting the knowledge base to a live agent. Start with simple cubes and iterate.
## Next steps
Browse all available connectors by category.
Build analytical models with measures, dimensions, and queryable APIs.
Resolve common connection issues for databases and imports.
Click **Save Cube**.
In the cube configuration panel, select measures, dimensions, and filters, then click **Run Query**. Results appear in the Results tab. Also check the **Generated SQL** tab to inspect the query and the **REST API** tab for programmatic access. Validate results against your source data.
Navigate to **Agents**, select your agent, open the **Configuration** tab, select this knowledge base from the **Knowledge Base** dropdown, and click **Save**. The agent can now query your structured data using natural language.
Always test the generated SQL in the cube query panel before connecting the knowledge base to a live agent. Start with simple cubes and iterate.
## Next steps
Browse all available connectors by category.
Build analytical models with measures, dimensions, and queryable APIs.
Resolve common connection issues for databases and imports.